
Last Updated: April 2015
New Zealand has a lot of big multi-day walks, and these are what a lot of people travel to New Zealand to do. Several of these walks are categorized as Great Walks, and you can read more about these Great Walks here. You can also find books that describe the Great Walks and books that describe other multi-day walks (or tramps). For example, there is Classic Tramping in New Zealand by Shaun Barnett and Rob Brown, which has some beautiful photos.
However, we only did single day walks, although I did manage to do a couple of the Great Walks as single day hikes. On this page I describe my general impression of the hikes we (or I) did, but don’t give many hiking details as you don’t really need them – the hikes are generally pretty obvious and well marked. We stayed in Wanaka and in Nelson, so all the hikes we did are in those two general areas; a few required some driving and overnight trips from our base.
Wanaka
Roys Peak
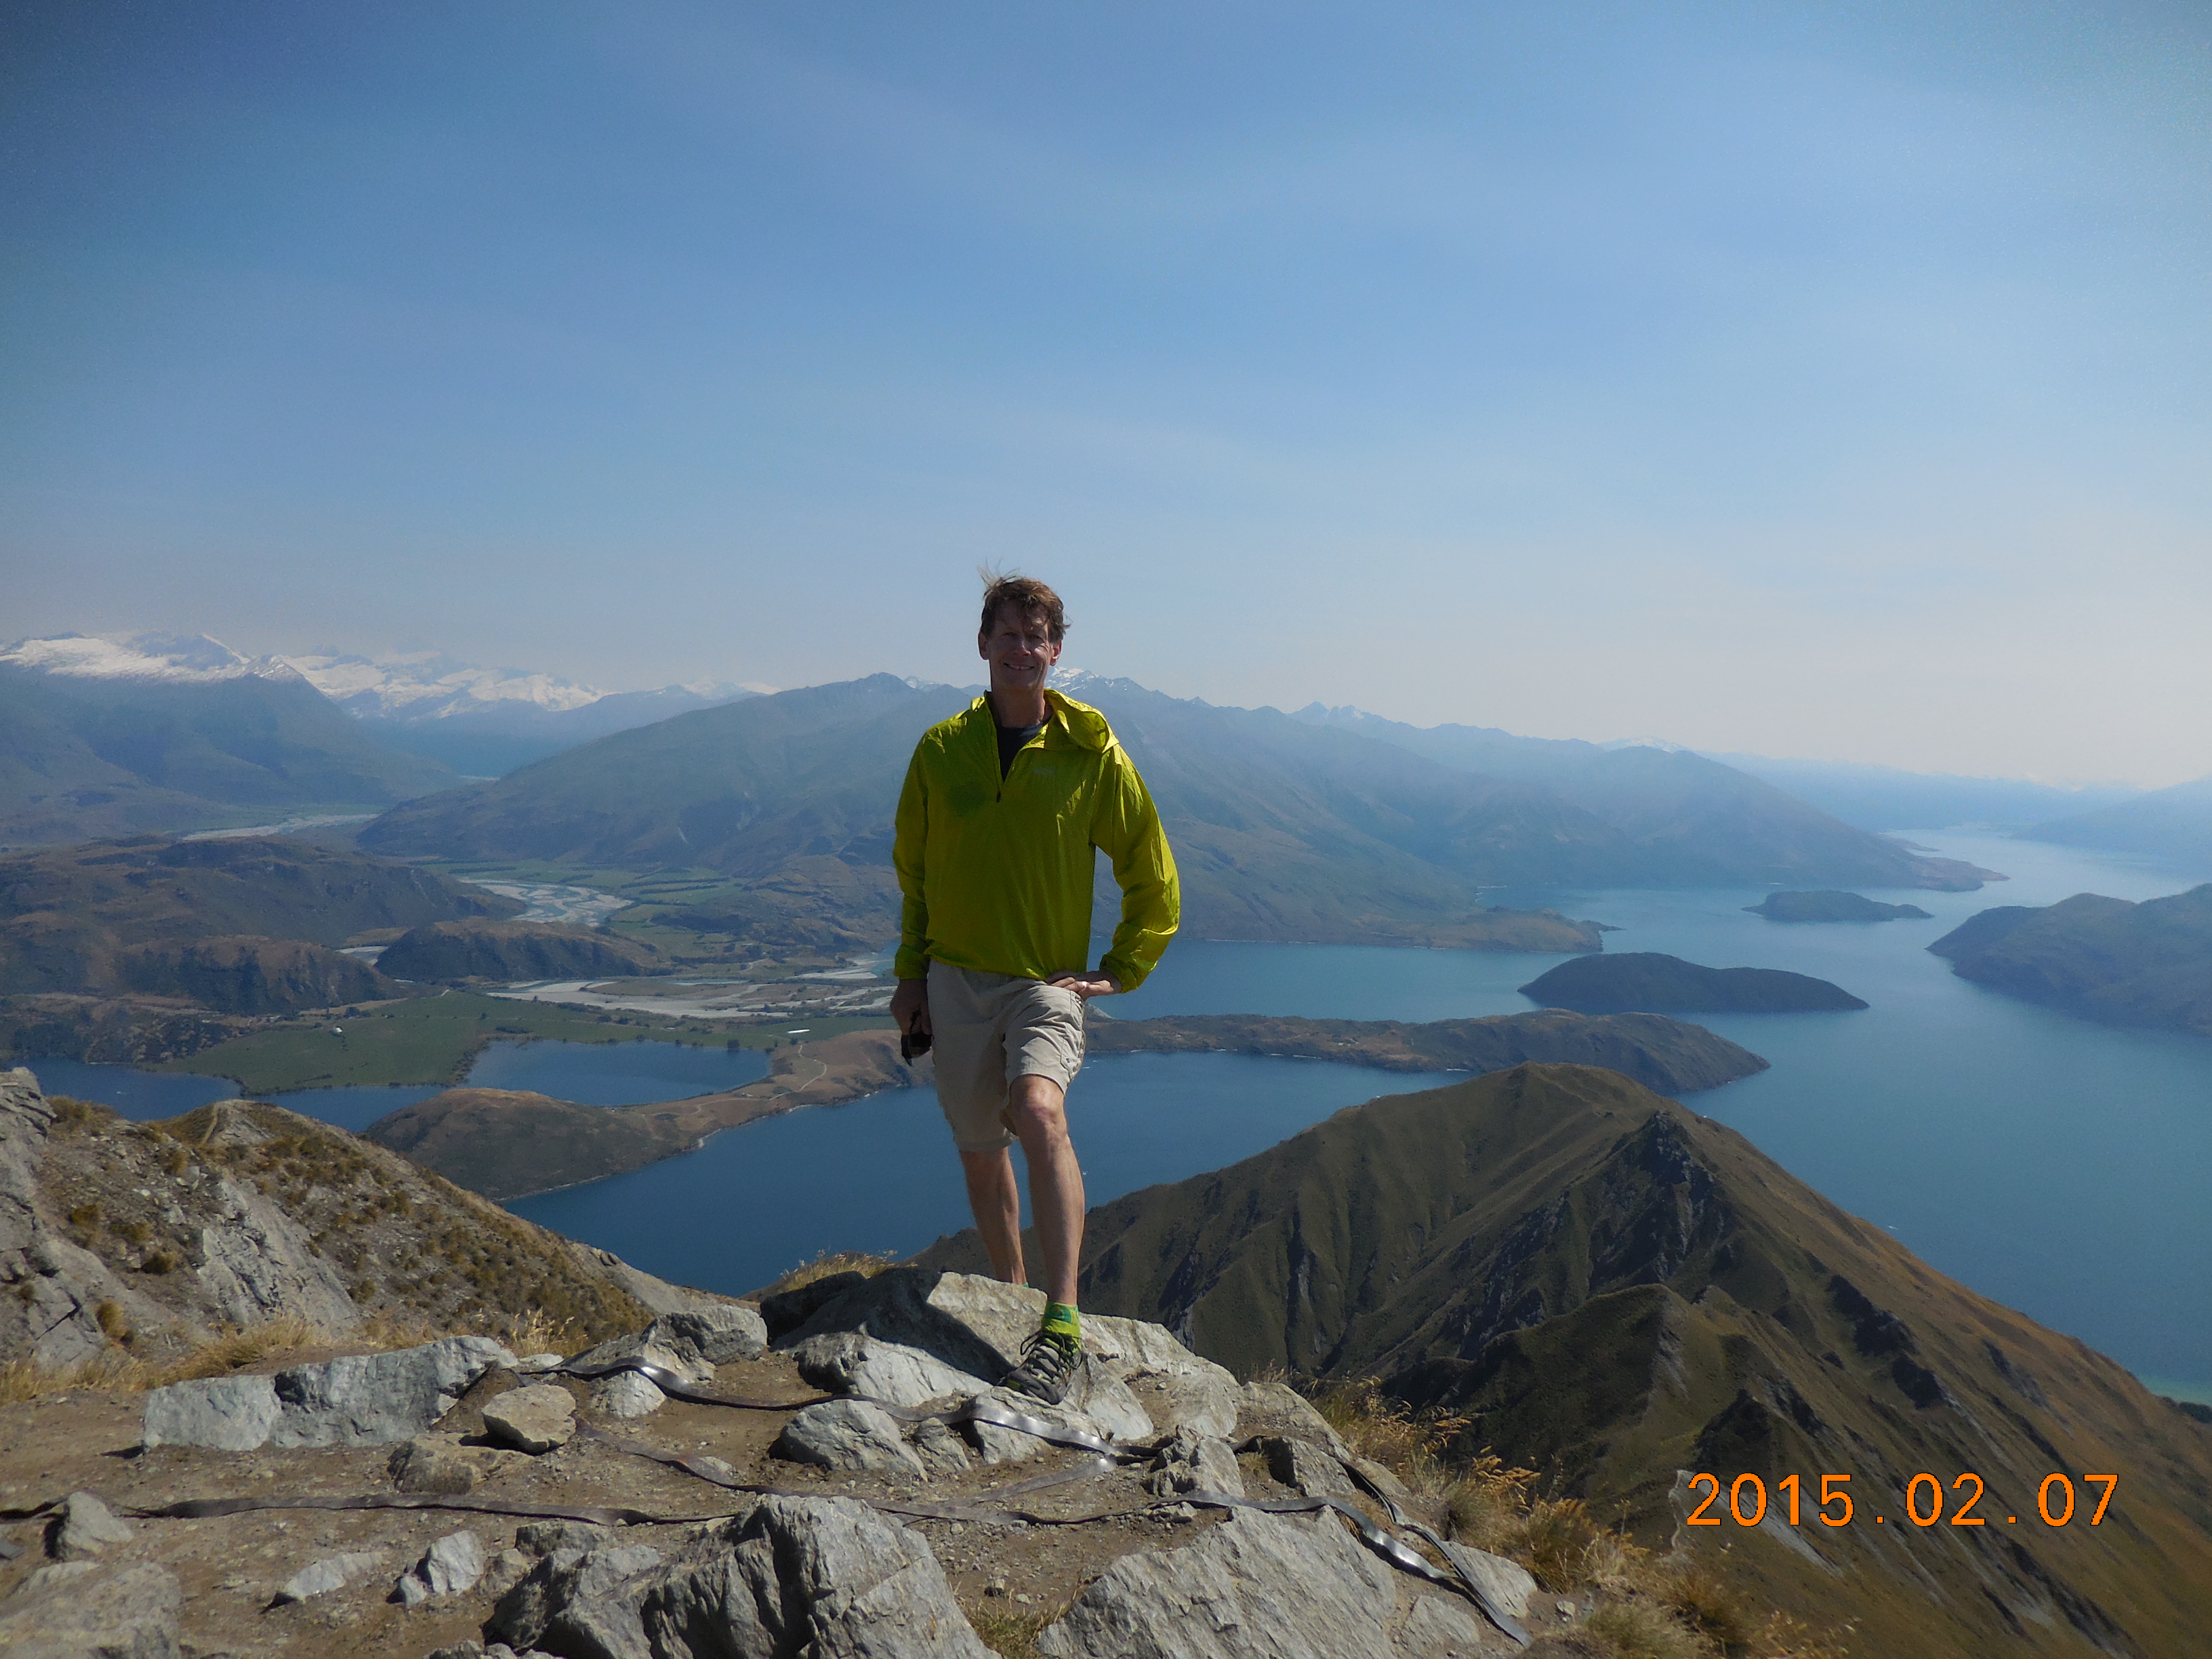
The top of Roy’s Peak looking over Lake Wanaka
This is wonderful hike, quite close to Wanaka, and well worth doing. The views from the top are spectacular. From the corner of Ardmore Street (the main street along the lakefront) and McDougall Street (on the west side of Pembroke Park), drive about 6 km west then north along Ardmore Street, which turns in to Mt. Aspiring Road. At about 6 km there is an obvious parking area on the left. This is the start of the Roys Peak Track.

On the grassy trail, half way up Roy’s Peak, with Lake Wanaka below
The track zig zags uphill endlessly, and the first half is on a beautiful grassy trail, a delight for the feet. About half way up, the grass turns into dirt and we met more than one person who had chosen to do the walk barefoot and who now regretted that decision. The top is always visible, close to the ridge line and with a large pole standing up. The guide descriptions suggest a time of 5-6 hours for the return trip. Roys Peak is 1,578 meters (5,177 feet). I don’t know the height of the parking lot, but let’s just say the hike has about 4,000 feet of elevation gain.
Skyline Route

The ridge between Roys Peak (at the far end) and Mt Alpha.
A great hike that extends the Roys Peak hike into wilder and more interesting terrain. You can do it from either end, and some people recommend starting at the Cardrona Road trailhead as you spend more time looking at views of the lake this way. I’d recommend doing it this way as I started with Roys Peak but got frustrated towards the end at the circuitous route you have to take to get down – and I must have missed a sign as I went the wrong way and ended up walking quite a bit further than I should have.
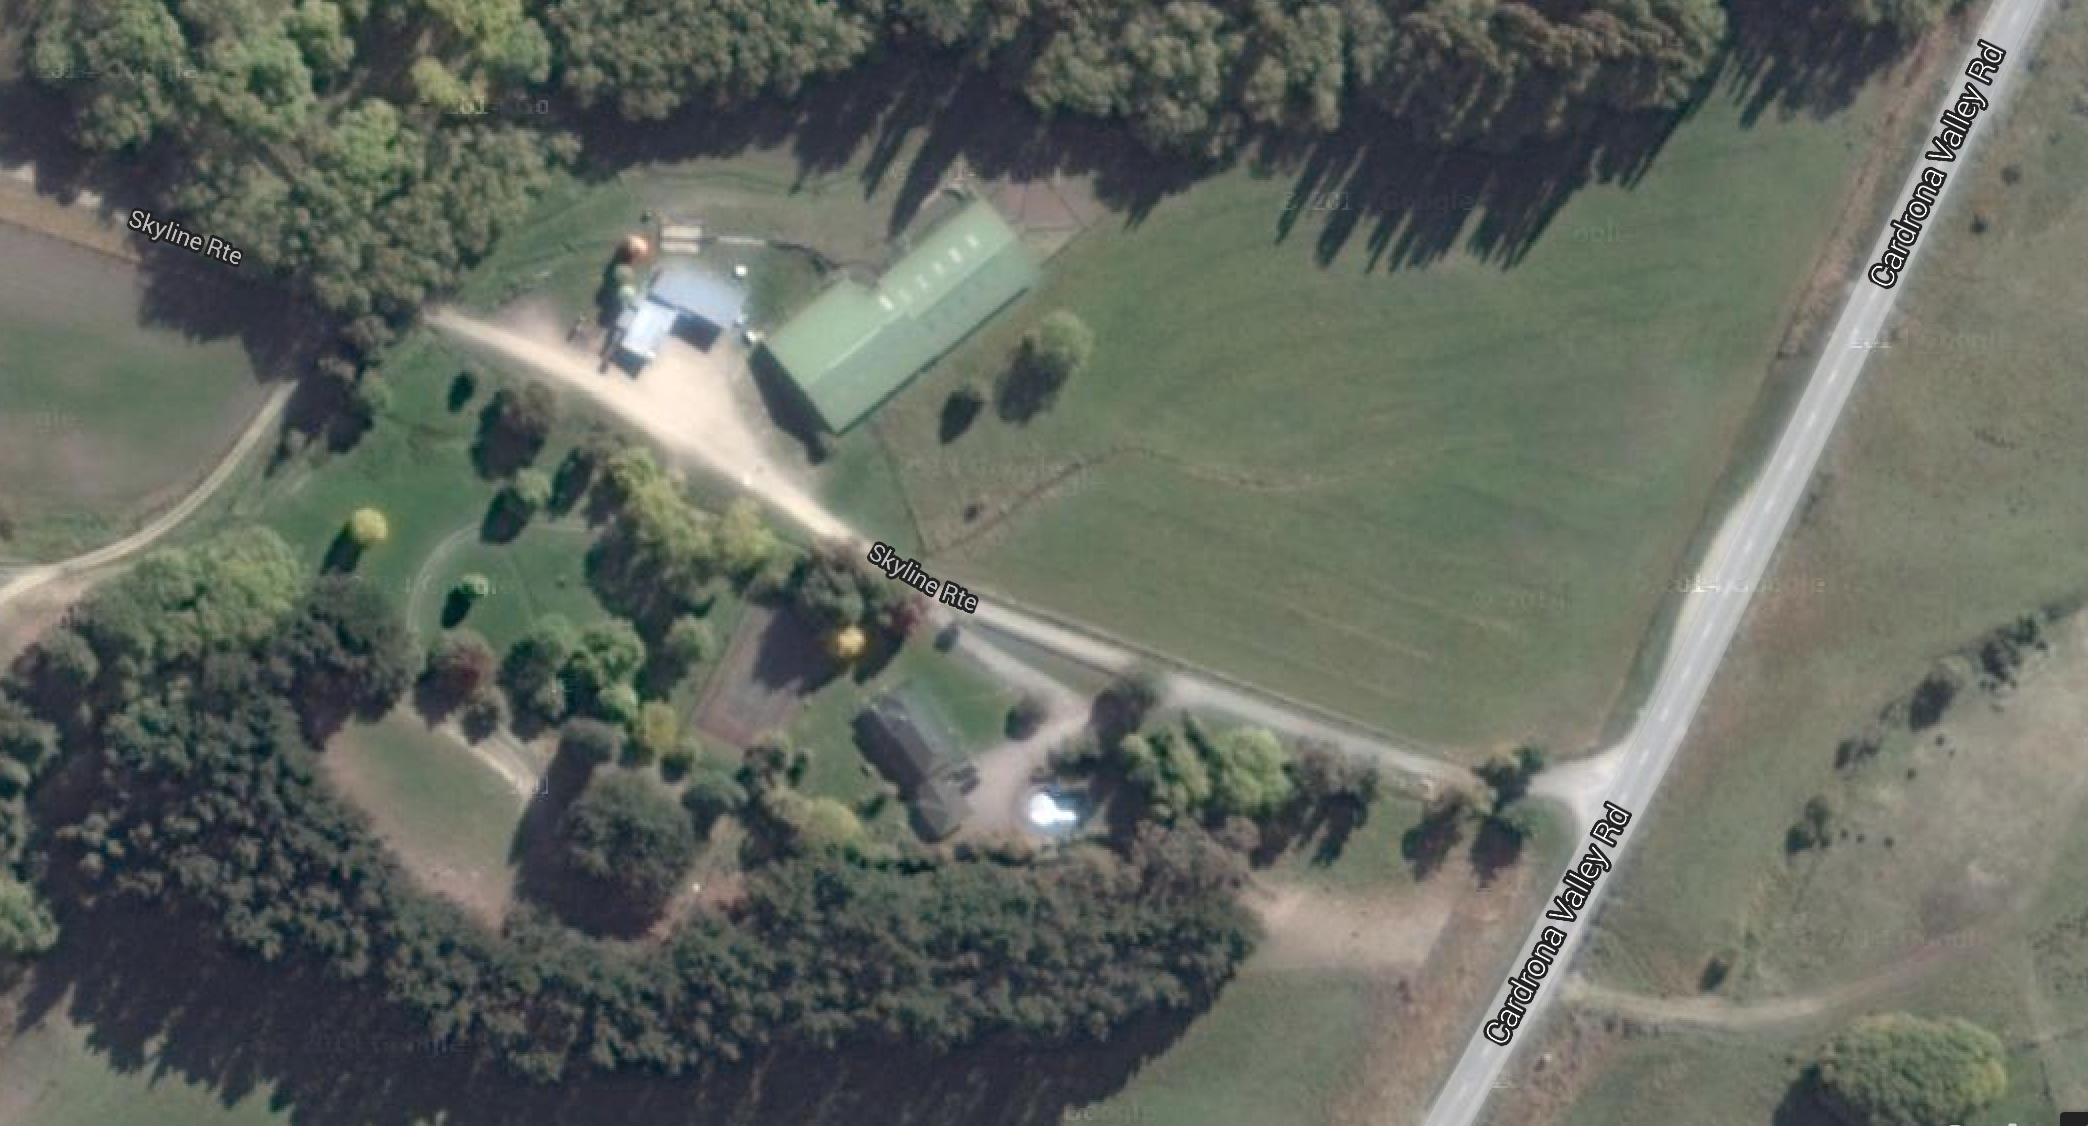 To get to the Cardrona Trailhead, drive about 6.3 km from the intersection of Cardrona Rd and Riverbank Road (this is south of Wanaka). The picture on the left shows what you are looking for. You can also search for Skyline Route on Google Maps.
From this trailhead you walk up through farmland then follow the trail up Spotts Creek and onto an old 4WD road on the ridgeline. Follow the road and then a trail up to the top of Mt Alpha (1630 meters). Follow the lovely, varied ridgeline over to Roys Peak (1578 meters) then take the standard trail down to the parking lot near Lake Wanaka. The guide suggests the hike takes 10-11 hours. I took 6h 20m but went wrong as I descended to the Cardrona Rd; it would probably have taken less than 6 hours if I’d gone the correct way. The most interesting part, between Roys Peak and Mt Alpha, took just over one hour.
Diamond Lake / Rocky Mountain
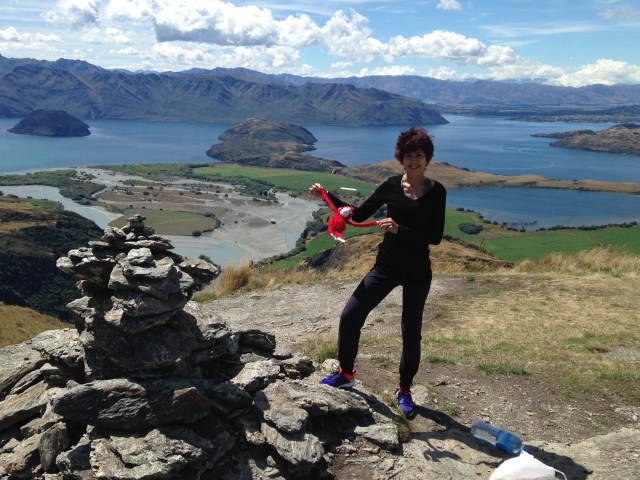
The top of Rocky Mountain looking down at Lake Wanaka
This is a short but varied hike near Wanaka with great views of Lake Wanaka from the top. You can do a very short hike up to and around Diamond Lake, or continue up to the top of Rocky Mountain. You can do the section above the lake either clockwise or counter clockwise. I’d recommend clockwise as you go up through some steep terrain (including some steps) and through what seems to be almost a rain forest. I.e., the trail can be a bit slippery, which feels safer going up than going down.
Rob Roy Glacier
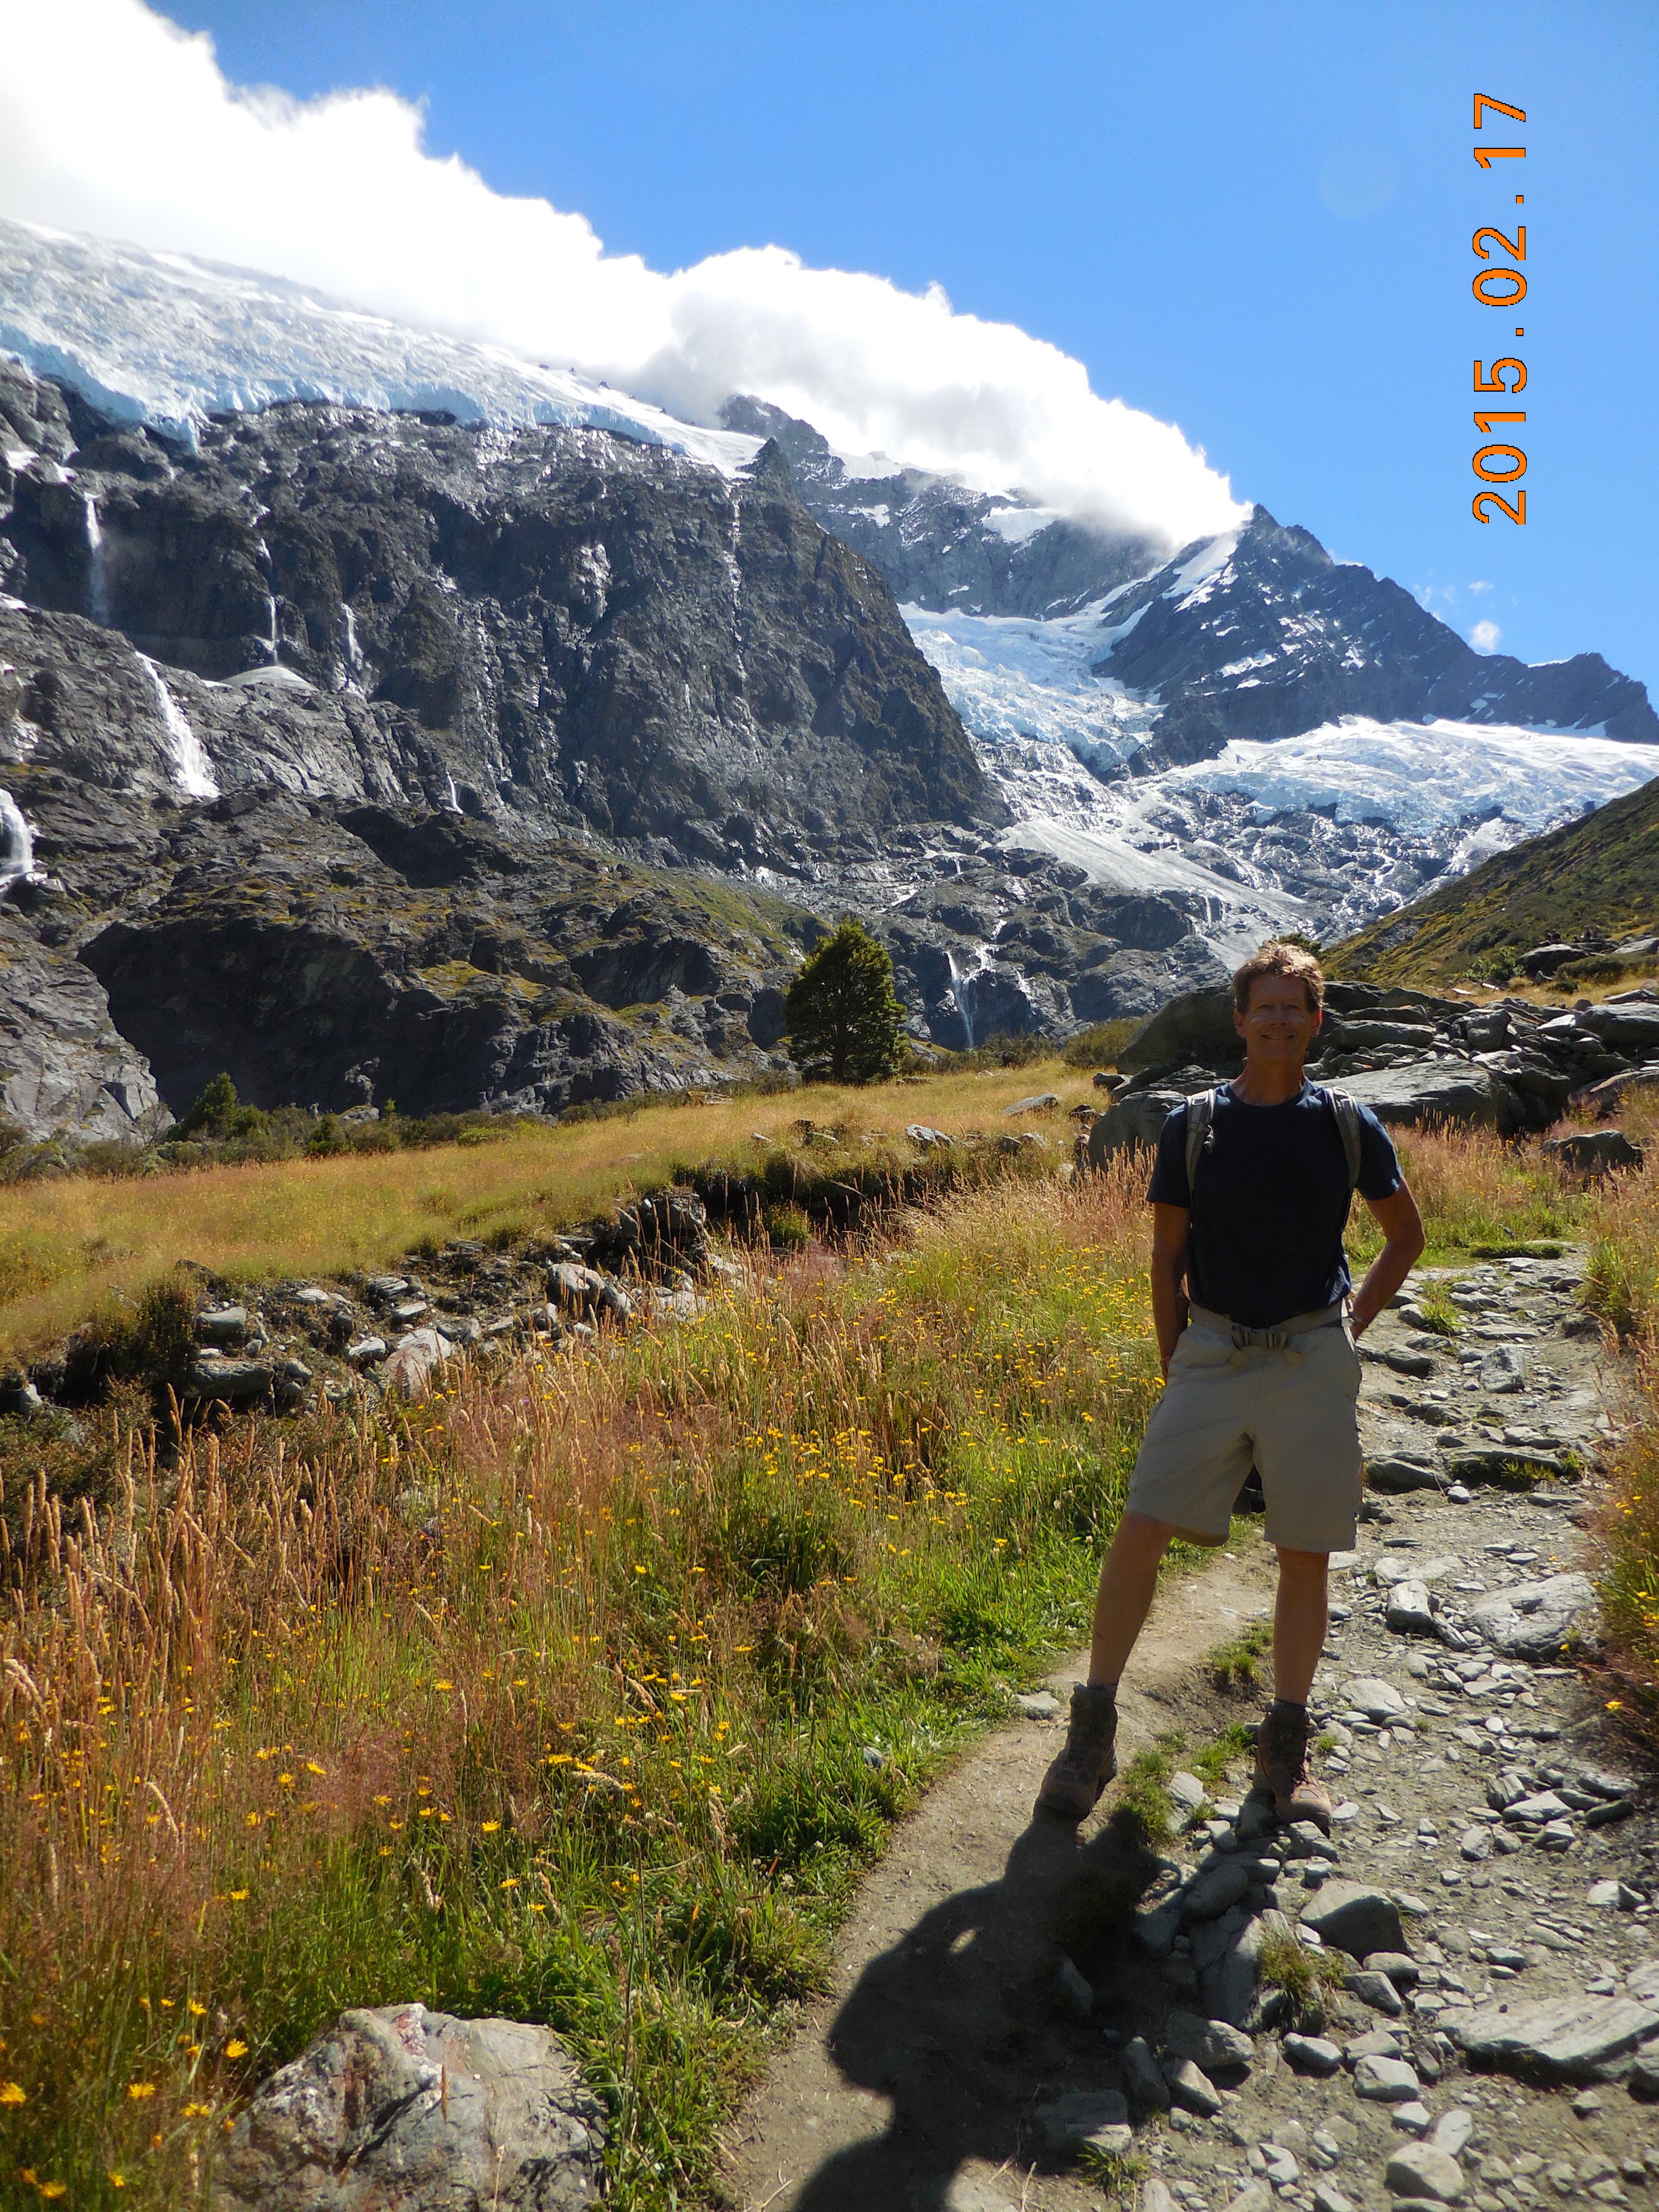
A good hike up to a spectacular view of glaciers and waterfalls. From Wanaka drive about 54 km along the Mt Aspiring Road to the Raspberry Creek Car Park at the end of the road. The last 30 km are on gravel, and towards the end the road crosses several fords. When the weather is dry some of the fords have no water, but in rainy weather the road can be impassable to regular passenger cars. If it’s been particularly wet, it’s worth inquiring at the Mount Aspiring Visitor Center in Wanaka – they have up-to-date information on the state of the road.
From the car park, walk up the river for about 15 minutes then cross the river on the swing bridge. Follow the trail up the valley to the first glacier view (about one hour from the car park.) However, don’t stop here because the second glacier view (another 30 minutes) is incomparably better. About a 3 hour return trip.
Isthmus Peak

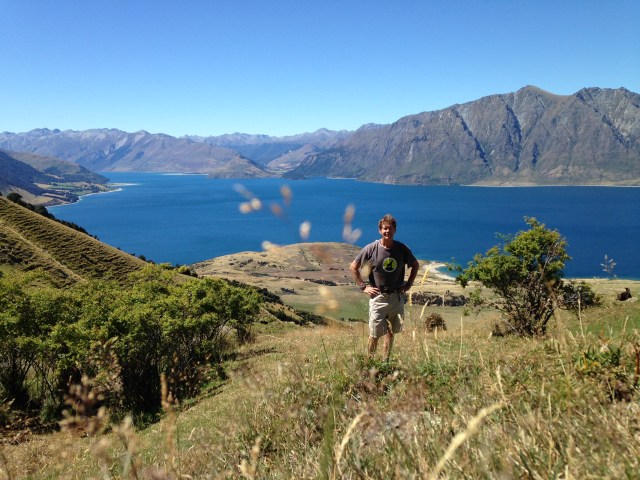
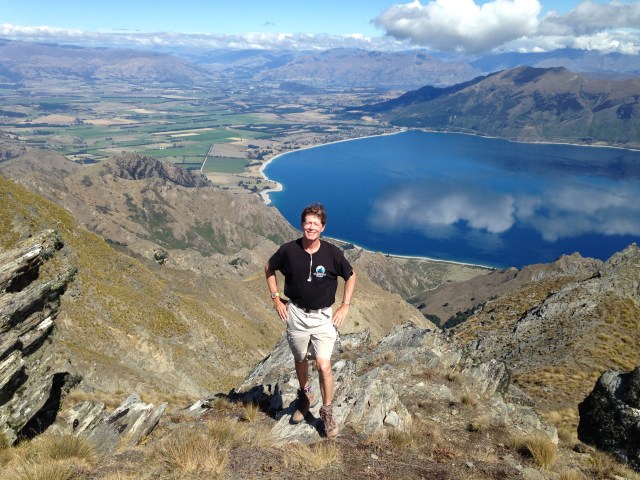
The top of Isthmus Peak, looking down at Lake Wanaka
This hike is about the same length as Roys Peak but the hiking is perhaps not quite as good, although the views are arguable better since you get to see two Lakes, Lake Hawea and then Lake Wanaka. Depending on where you read it, the hike takes 5-6 hours or 6-7 hours round trip. I’d say the former is more accurate. Isthmus is 1385 meters high (4543 feet). I don’t know the elevation of the parking lot, but let’s say the hike gains about 4,000 feet.
On the way down, looking down at Lake Hawea.
Head east from Wanaka on State Highway 84. Just after Puzzling World, turn left on Highway 6 towards Albert Town. About 29 km from the intersection you will arrive at the Isthmus Peak parking area on the right. Park here then cross the road and follow the track left as it parallels the road for a hundred meters or so. The track then turns right and heads upwards for a way, then leftwards for a way, then starts zig-zagging its way to the top. Once you are on the upper plateau, the trail splits, and a sign points to the right to Isthmus Peak.
Breast Hill
Looking down at Lake Hawea from the top of Breast Hill
This is a very strange hike with a strange name. It’s steep, varied, exposed, and not for the timid or faint-hearted. One of the more interesting hikes in the area, it’s usually done as part of a multi-day backpacking trip. However, it makes a very good day hike: it took me 2h 50m to the top and 5h 6m car-to-car.
Breast Hill is 1,578 meters (5,177 feet), the same height as Roys Peak. The first steep section is apparently 400 meters (1,312 feet) of elevation gain, and to get to the Pakituhi Hut you gain 950 meters (3,117 feet). The full elevation gain to the top of Breast Hill is maybe 1,200 meters (3,937 feet).
Drive past the town of Lake Hawea on Cemetery Road and turn left on Gladstone Road, which follows the east side of the lake. From the intersection, follow the mainly-dirt Gladstone Road for about 4.7 km to the trailhead. There is a trailhead sign on the right. About 150 meters past the trailhead is a sign on the left telling you that there is a parking area in another 150 meters. Directly across from the parking area you can see beautiful switchbacks cutting across the steep hillside up a wide grassy gully. From the parking area, walk back 300 meters and start the trail.
Zig zag up the hill to the saddle, then climb very steeply up near the exposed edge. This would be terrifying in the wet. Once you top out, continue more easily up the ridge to the main ridge and a fence. Turn left and follow the fence up and up and up until you get to another fence and a sign showing the Pakituhi Hut straight on, and Breast Hill to the left. (The hut is out of sight but only about 100 meters further on.) Turn left and follow this fence up the field and along the edge of the cliffs until you reach the summit of Breast Hill. The whole section along the fences feels rather bizarre – it just doesn’t seem right to be this close to a fence for this long.
Mt Pisa

I read about this hike in Day Walks of Central Otago & the Queenstown Lakes District, by Peter Dymock. The author says this about it: “This is the most direct and interesting route to the summit of Mt Pisa (1,964 m – 6,444 feet), but involves a very long, steep climb of almost 1,600 m (5,249 feet). This is one of the harder walks in this book, but also one of the best.” With a description like that, how could I refuse? It’s a big and long hike – the guide suggests an 8-12 hour return trip; it took me 6h 4m.
Coming from Wanaka, measure the distance from the intersection of Highway 6 and Highway 8A. This is just south of Wanaka airport and about 2 km north of the bridge in Luggate. From the intersection drive 28.6 km south to where Gilmore Road goes off to the left (Google said 27.3 km). On the right hand side of the road is a small sign saying Pisa Station. A forest road leads west towards Mt Pisa. This is the access suggested in the book and is slightly shorter, if less obvious, than the access described below.
The other, more obvious access is to continue 1 km further south – 29.6 km south of the intersection of 6 and 8A and turn right at Mt Pisa Road. After a few hundred meters turn right onto a dirt road leading to Mt Pisa Station, following the Conservation Area signs. In a few hundred meters turn right again following the signs to the car park. From here it’s about 4 km to the car park (really just a field), along a winding, up-and-down road, past several gates that you have to open and close. The road is easily drivable in a regular passenger car.
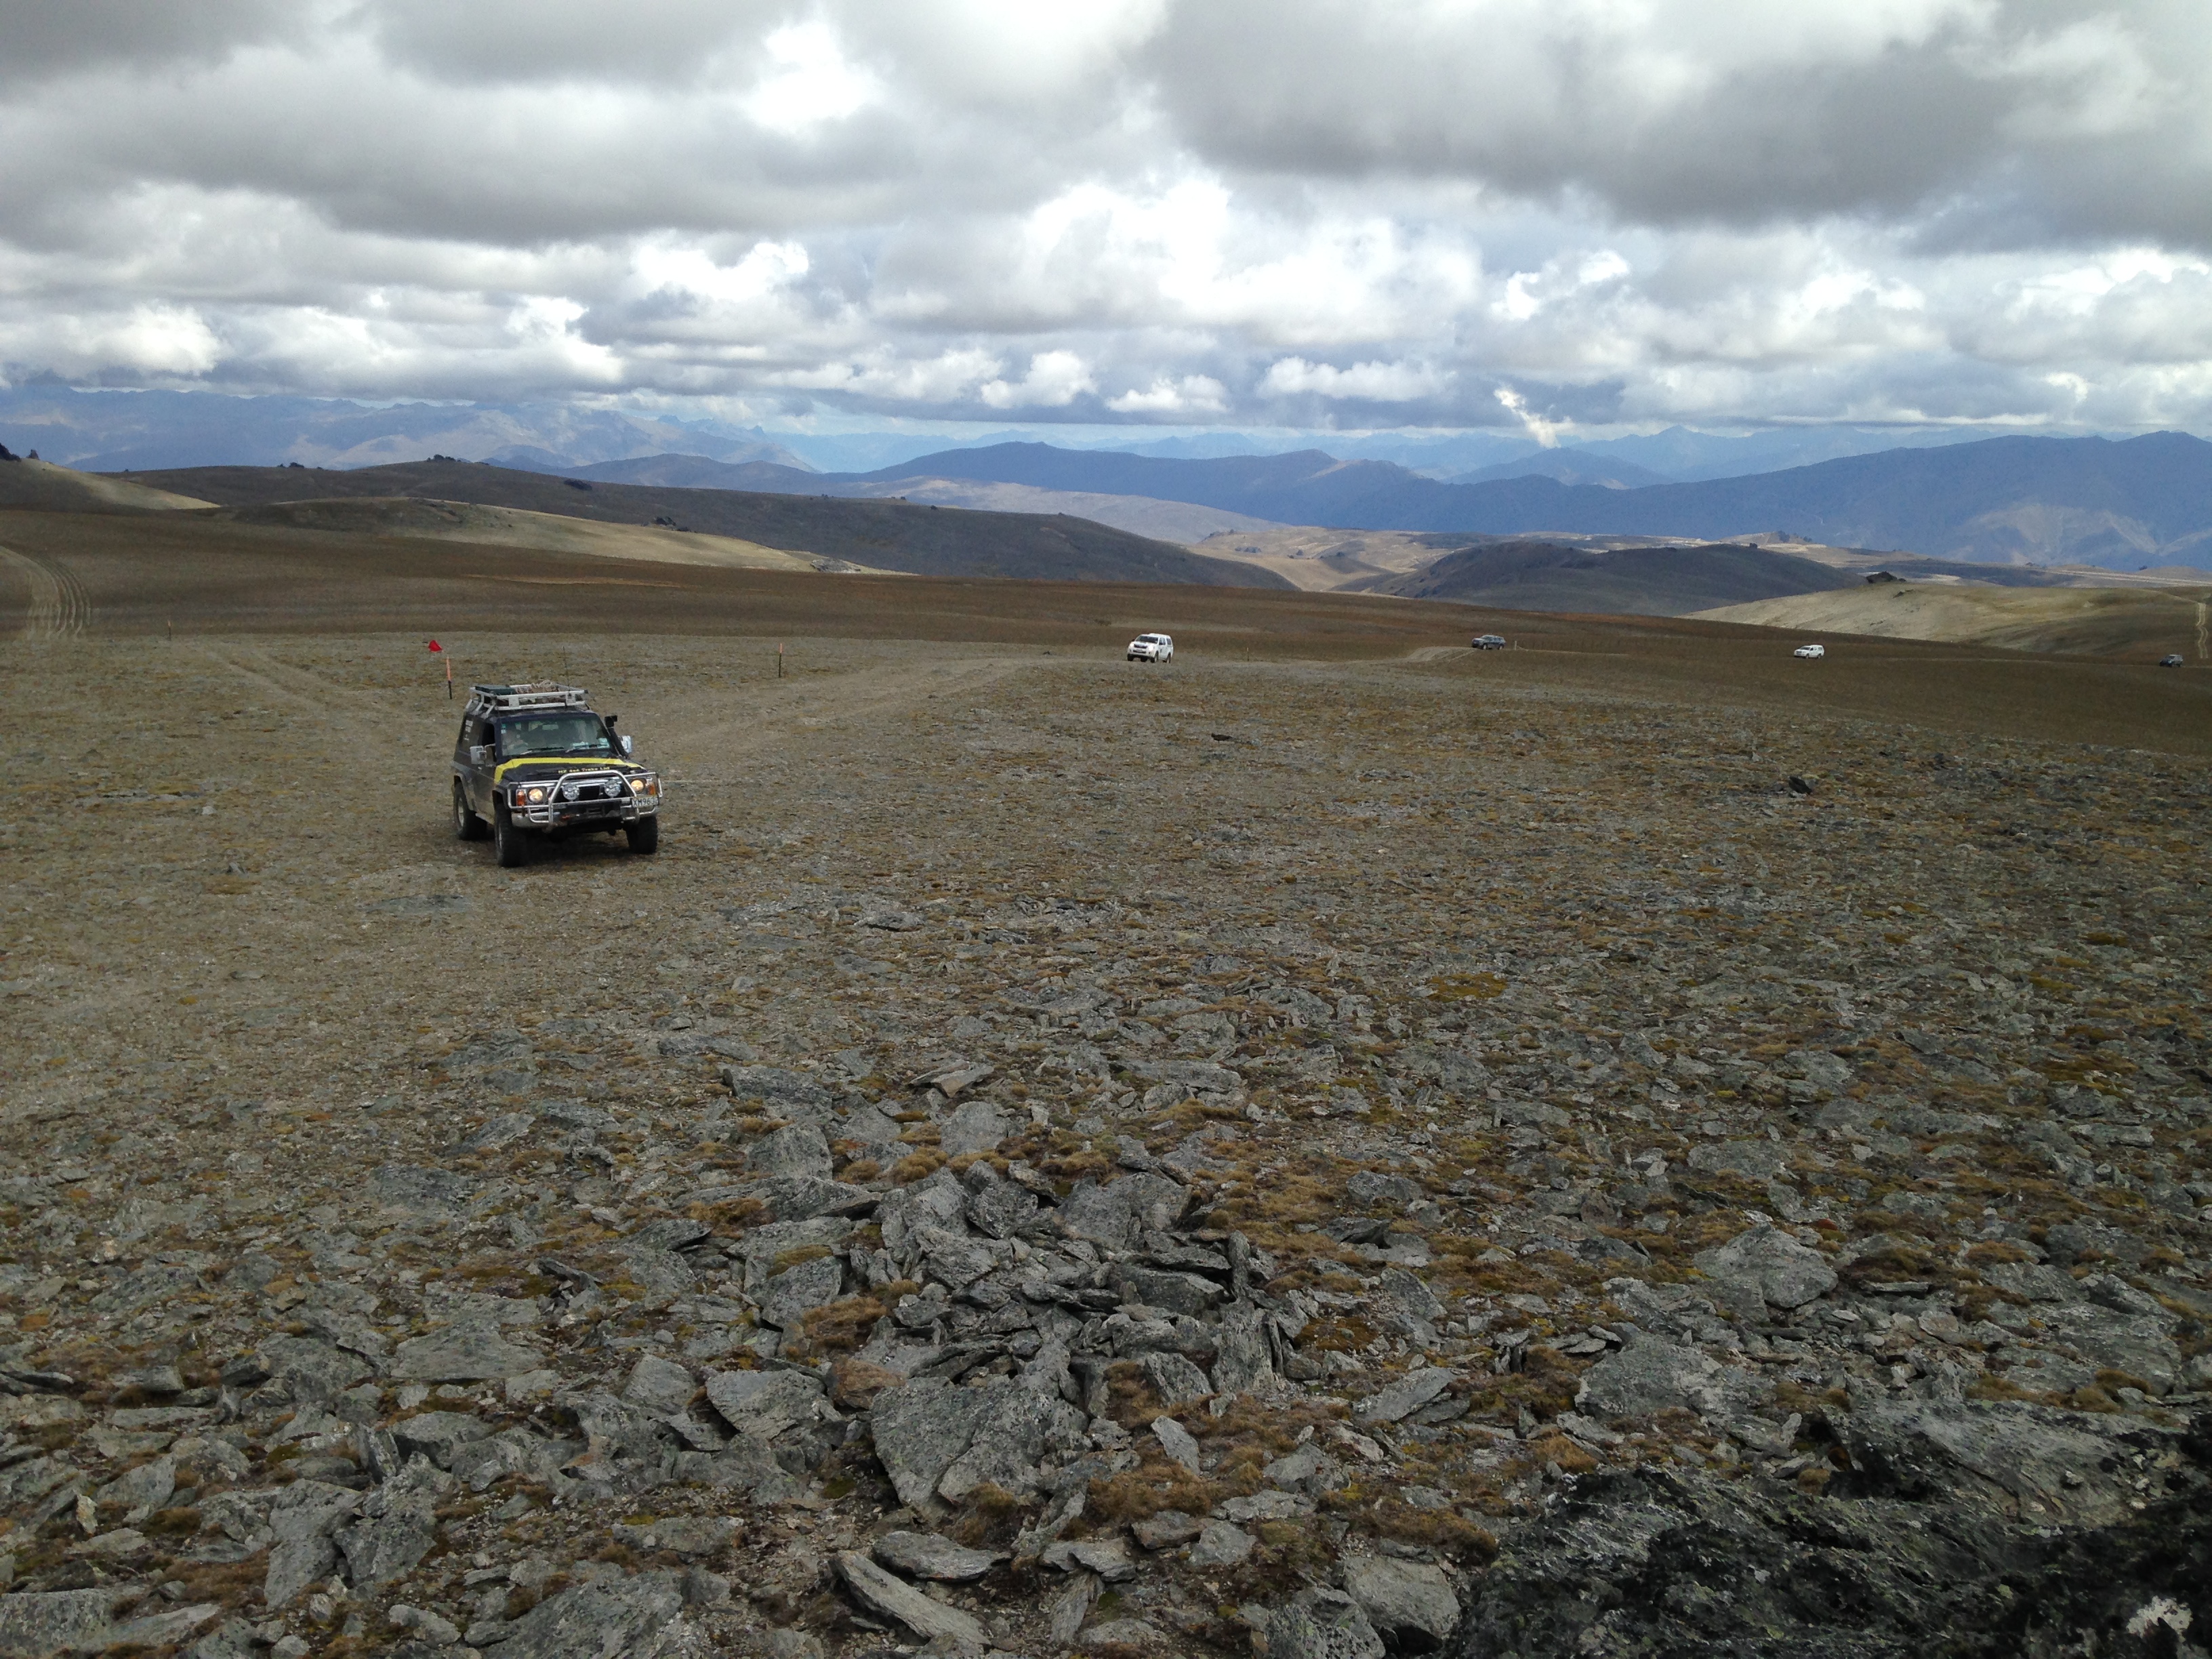 From the car park, follow the old dirt road up and up and up until it tops out on the flattish summit plateau. Follow the orange stakes northward for another 2 km or so to the rocks at the summit of Mt Pisa. The strange thing about this plateau is how many dirt roads there are up here. When I was at the top eating my sandwich, a jeep safari drove up.
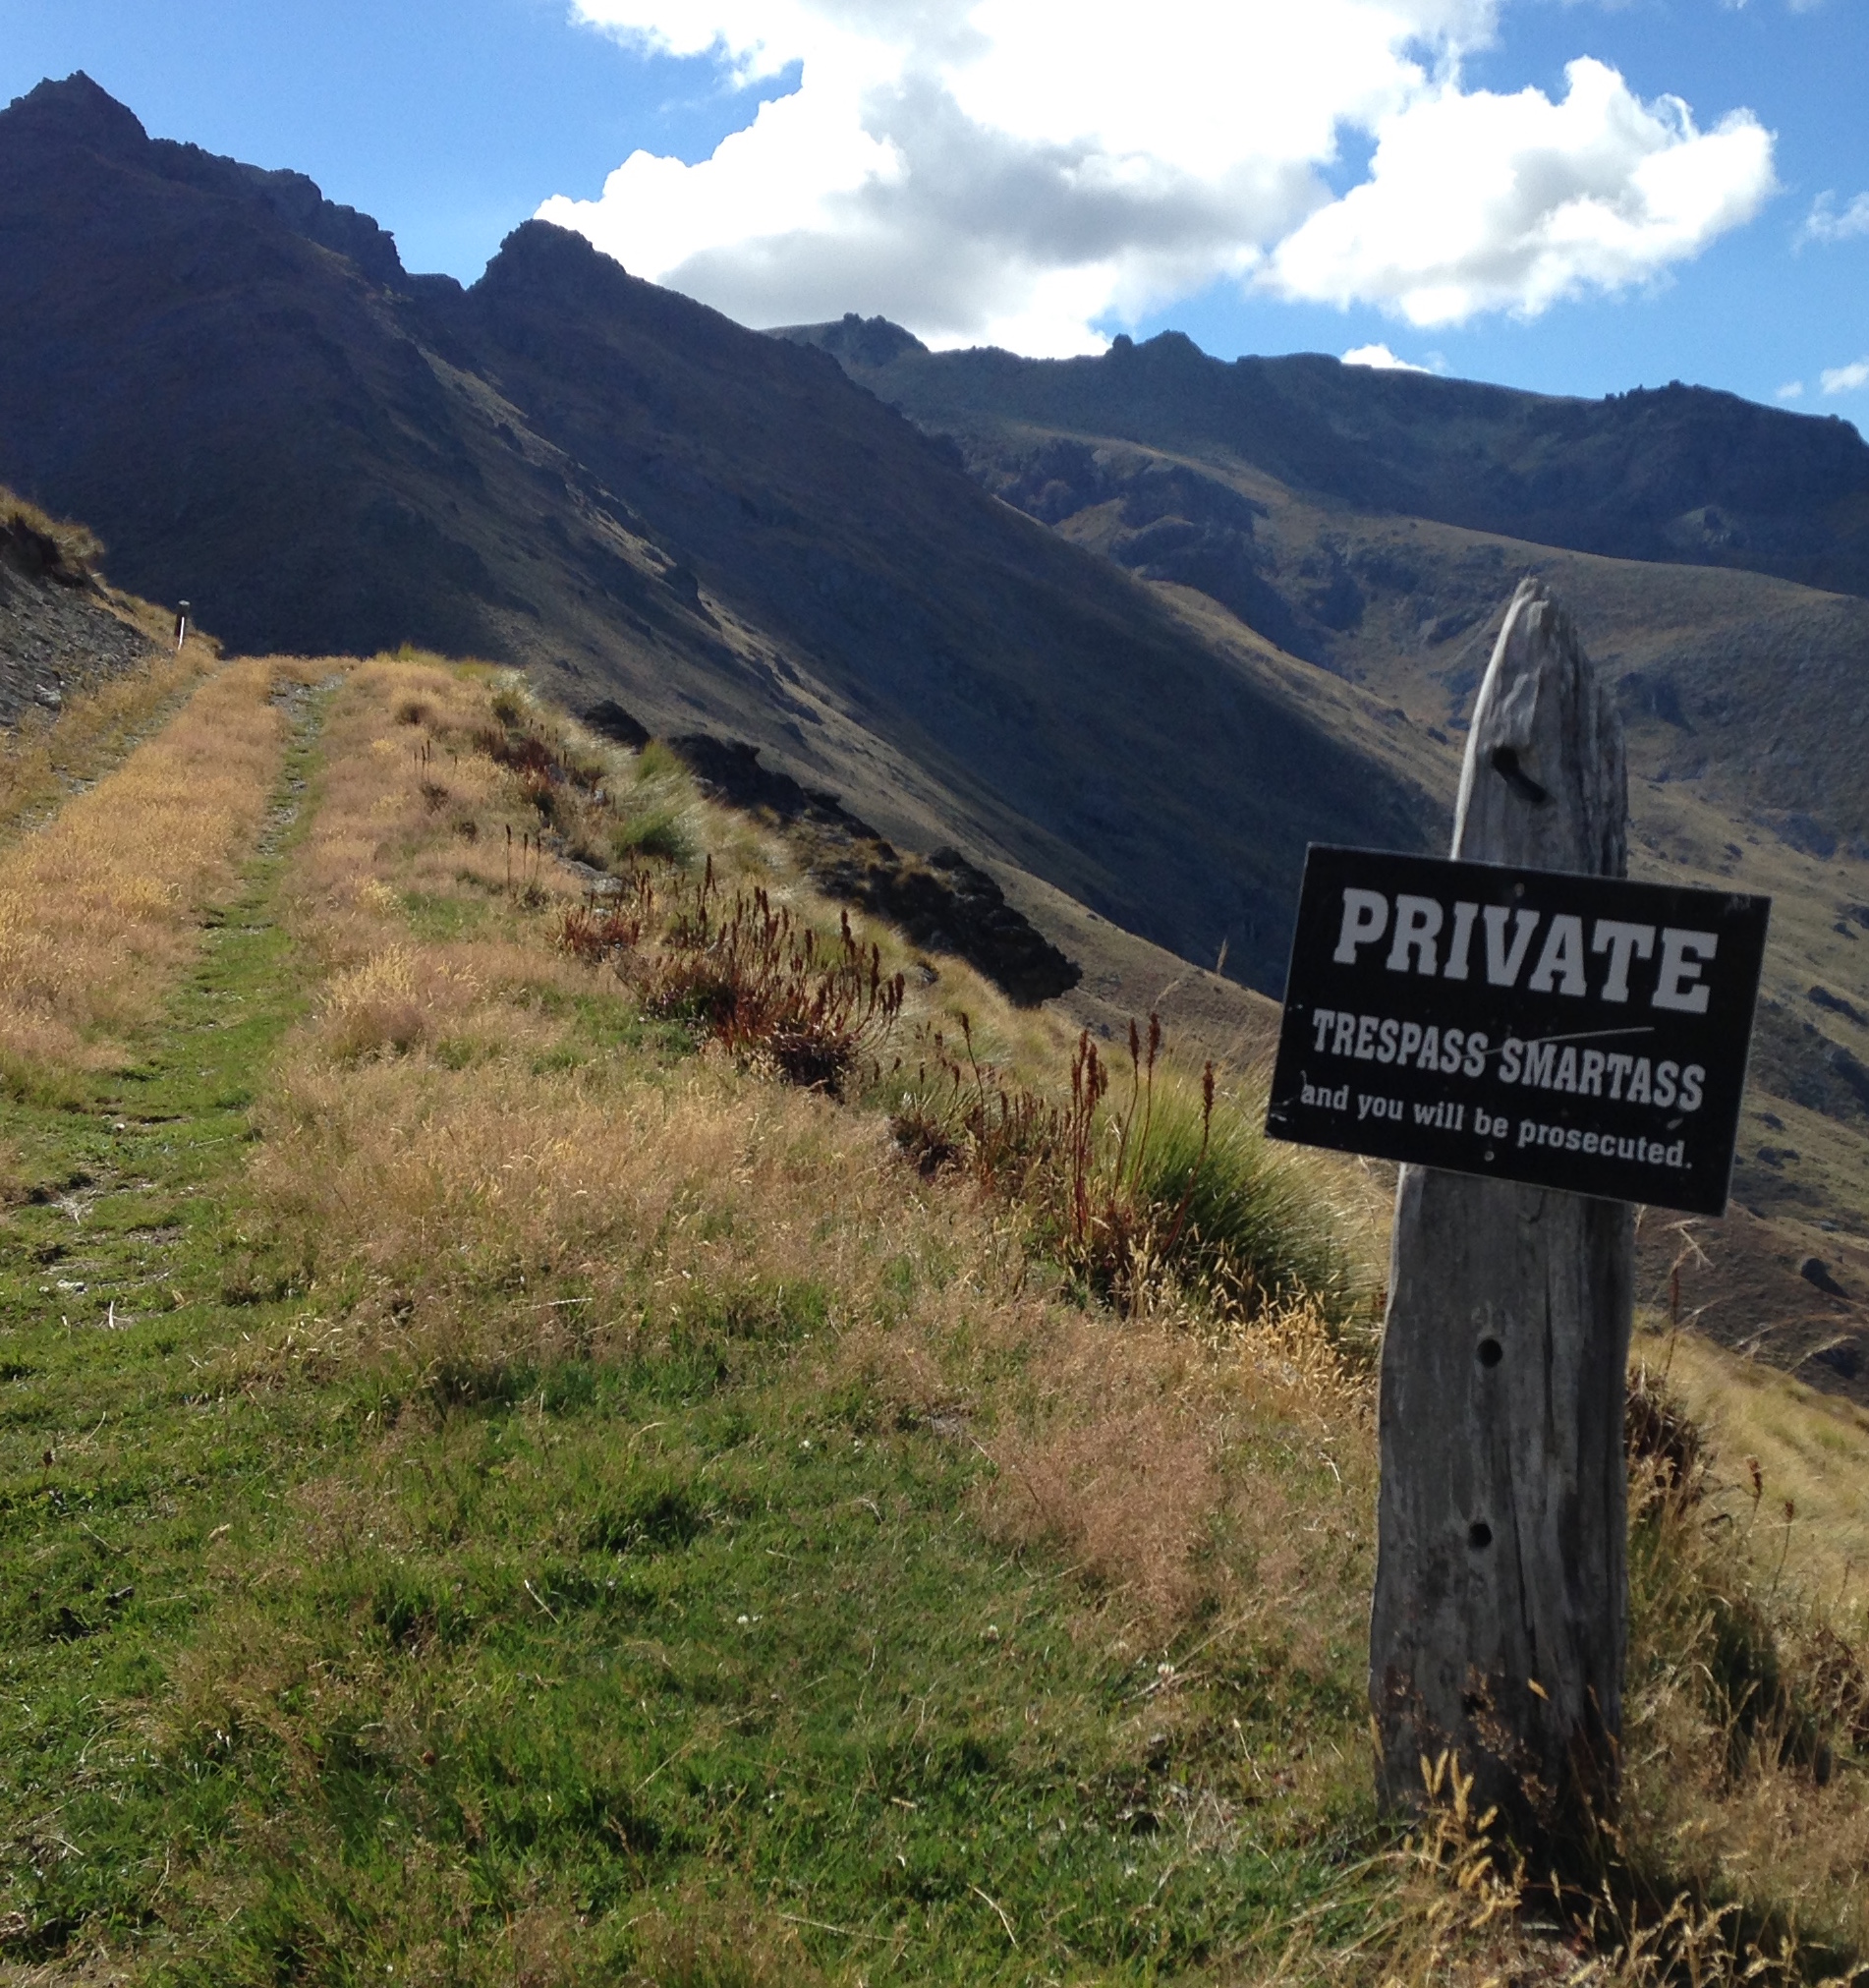
The guidebook mentions an alternative route from the 1430 meter point, but the friendly New Zealand farmers have posted a sign suggesting that this might not be a good idea.
Queenstown
Ben Lomond
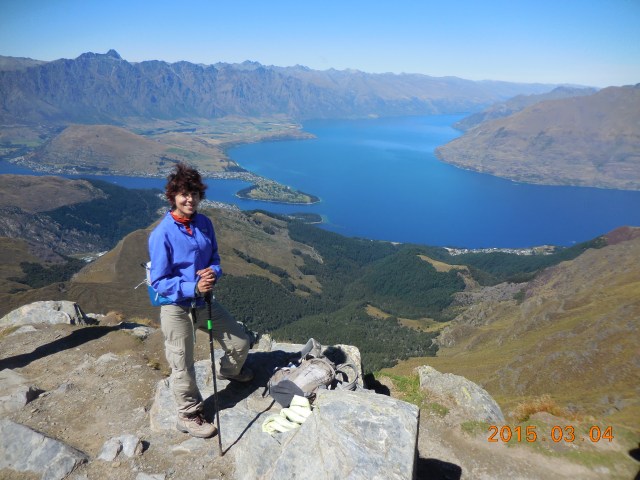
View from the top of Ben Lomond, looking down at Lake Wakatipu
A very popular hike with some of the most spectacular views around. The trail is not the best, and in places seems to have been eroded by water or too many people. You can start down in Queenstown, or do what we did and many others do, and take the gondola, which cuts out the initial hike through the trees. Ben Lomond is 1,748 meters (5,735 feet) high, and taking the gondola cuts out 450 meters (1,476 feet) of elevation gain – according to the gondola’s stats.
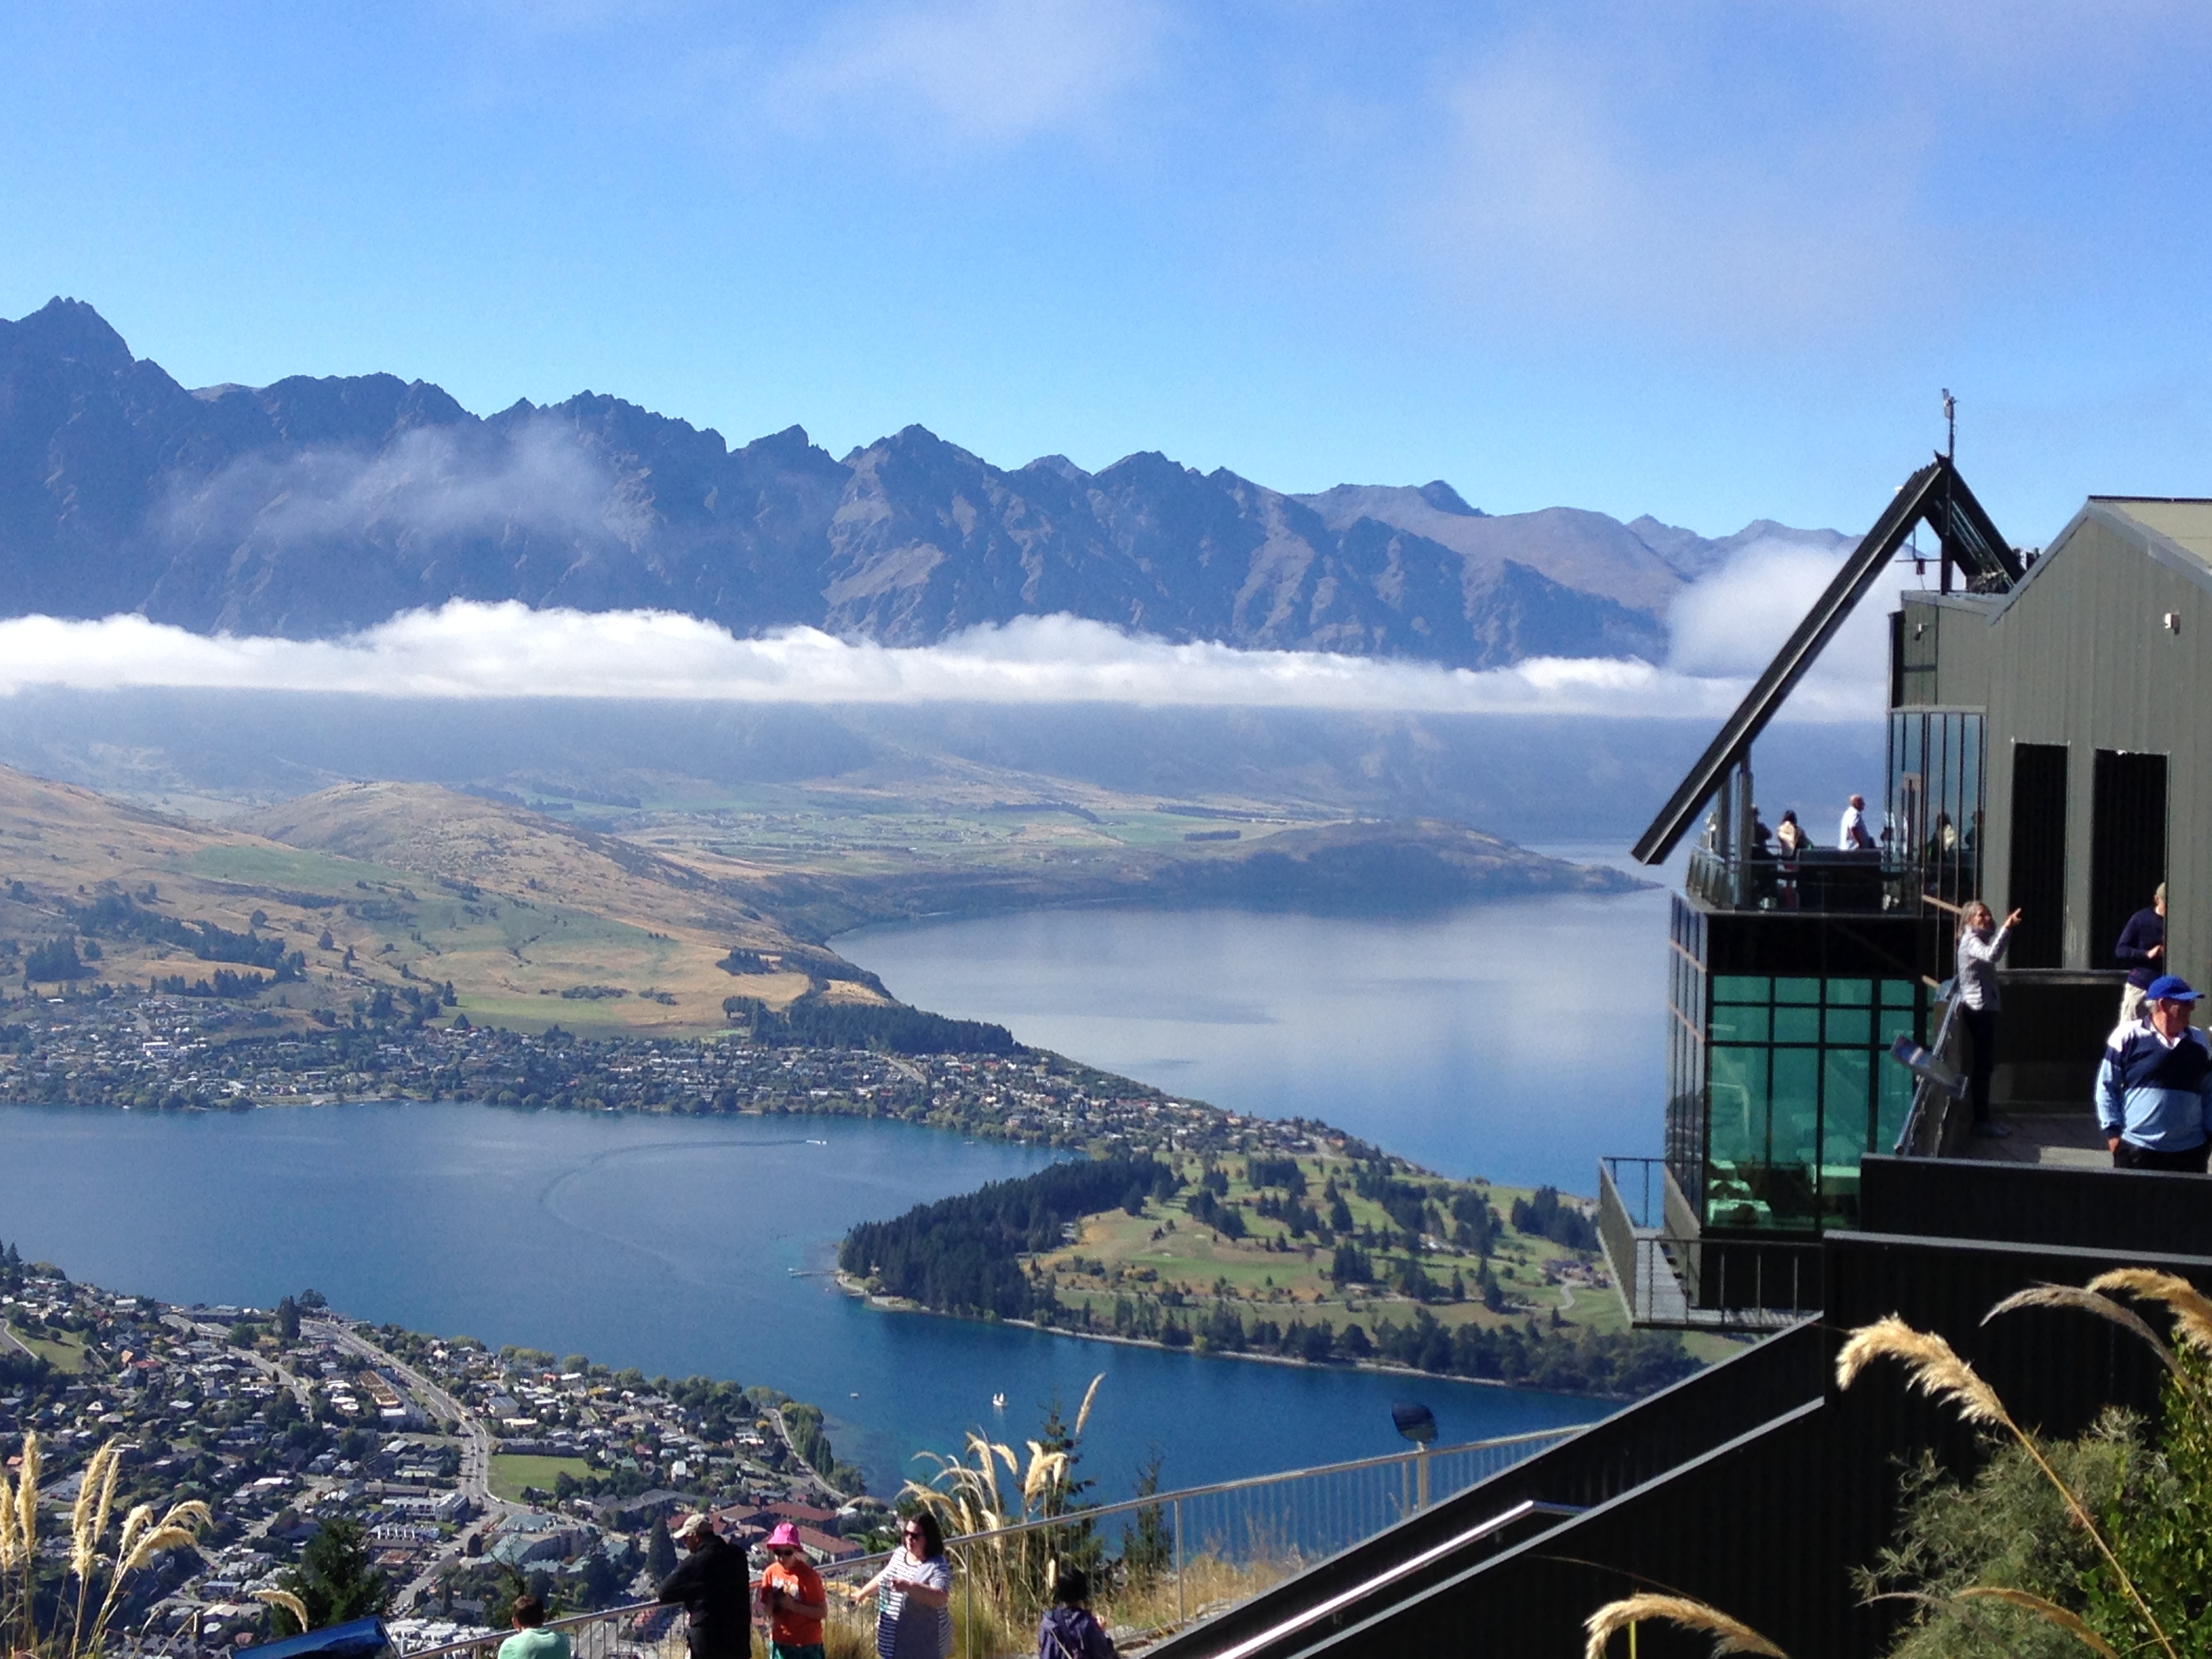 At the top of the gondola there is a shop, a restaurant, bungee jumping, luge, and of course hiking. The Ben Lomond trail is well marked and leads initially into a dark wood. A few minutes later you leave the wood, descend a short way, then head up towards Ben Lomond saddle.
Once at the saddle you turn left and head much more steeply up the ridge towards the summit, passing a few rocky sections. The last few hundred feet ease off and the walking becomes easier. From the top the views are simply stunning in all directions.

A panorama shot. Click for a better view.
Queenstown Hill
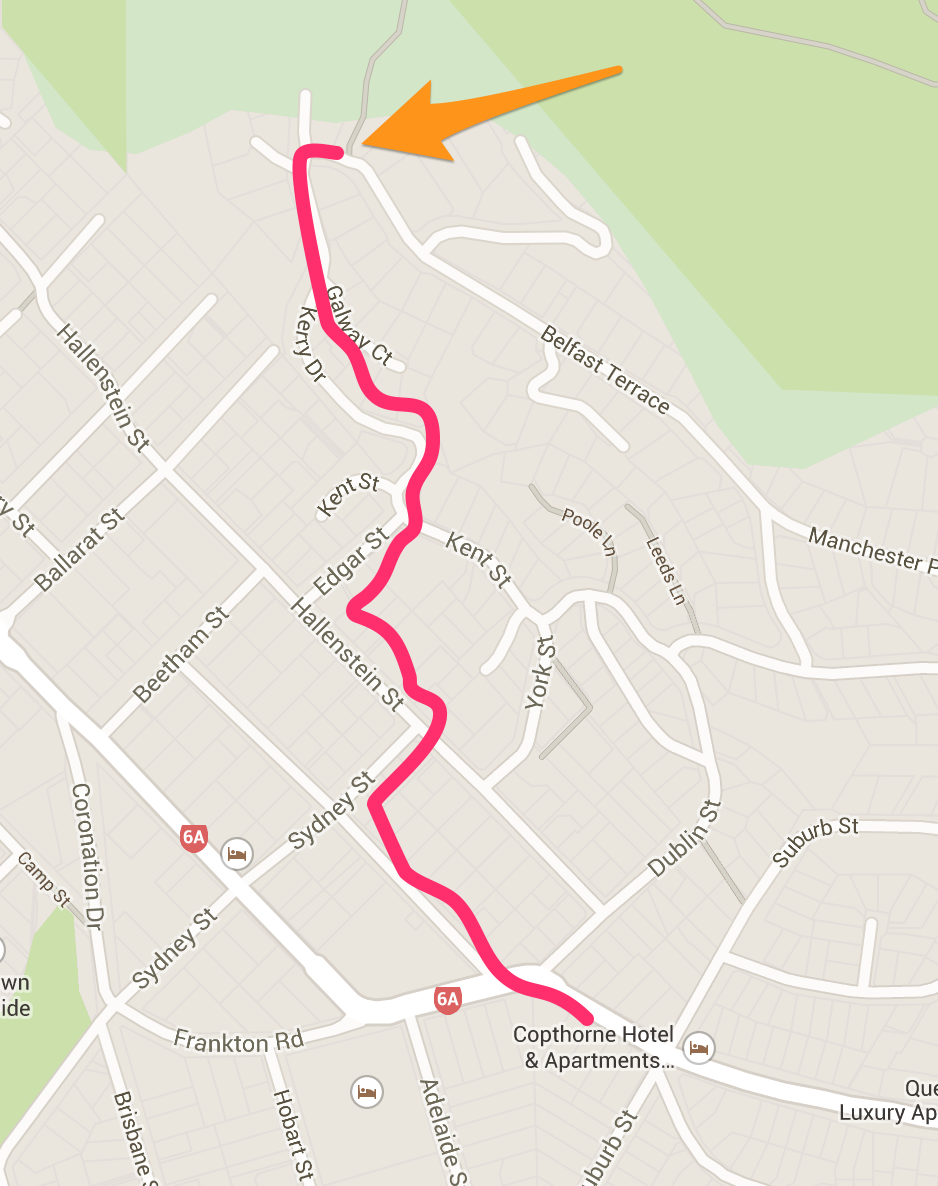
The first road off the main road is Melbourne Street.
A fun little hike if you are in the area and a) the weather is not so good, or b) you are looking for a shorter hike with some good views. The trail starts by switchbacking up inside a small wooded area, passing a cairn forest (you’ll understand what I mean when you see it.) The woods end and you reach a big outdoor artwork. From here you climb steeply to the top.
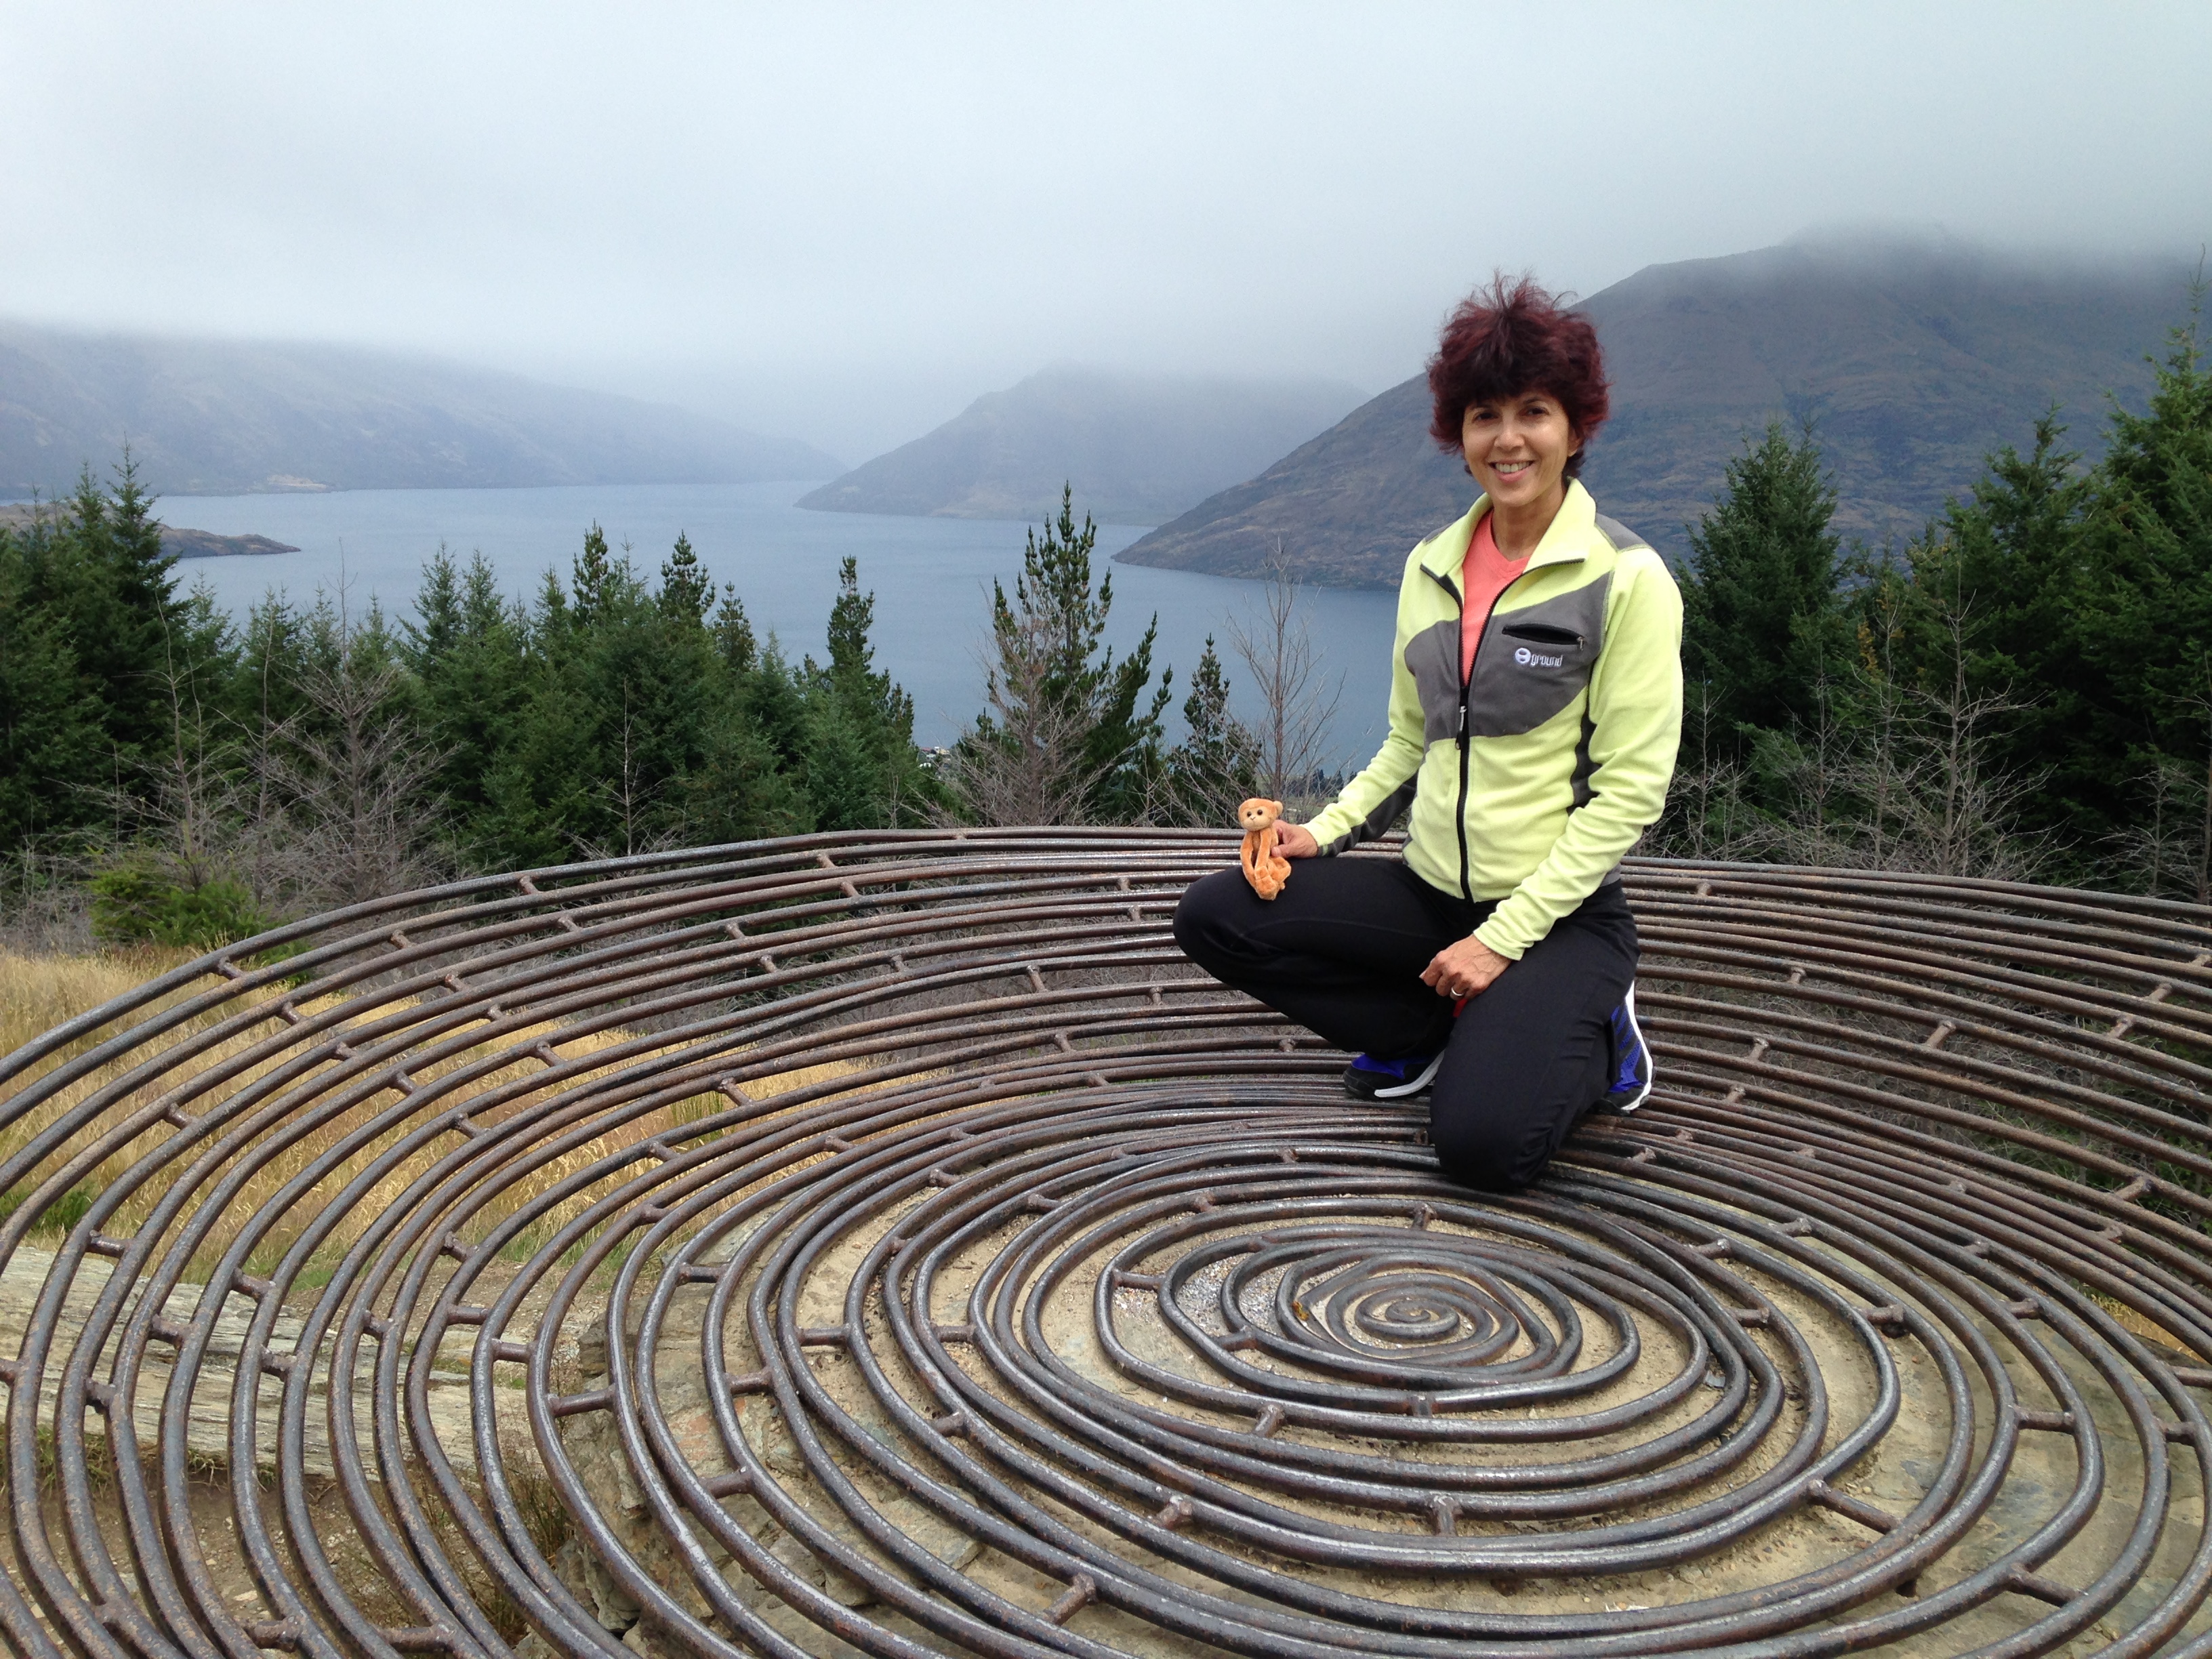
Tanya perched in an artwork, halfway up the Queenstown Hill
Aoraki / Mt Cook National Park
Sealy Tarns
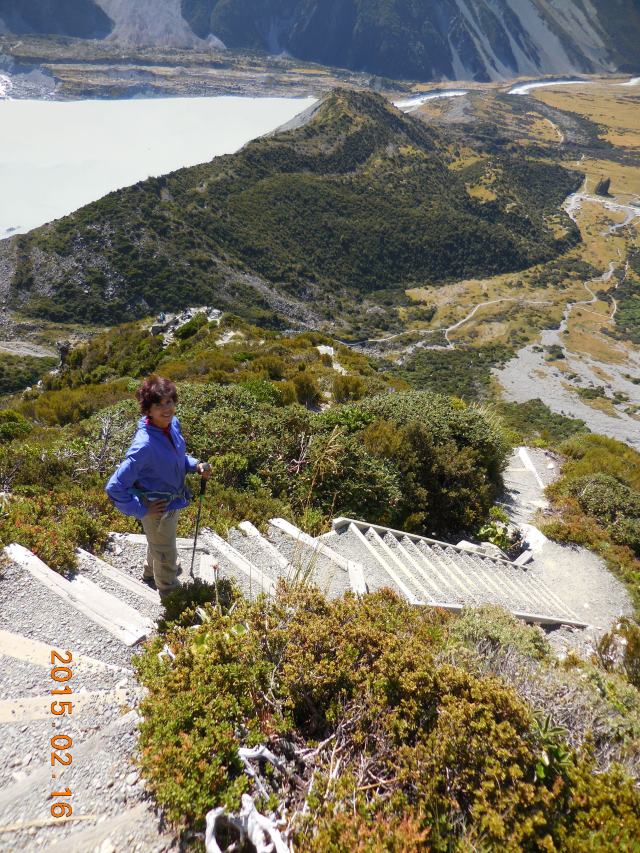
Looking down some of the 2,200 steps
The hike to Sealy Tarns is one of the strangest (and most fun) hikes I’ve done in a while. After a flat start it soon heads directly up a very steep hillside. Rather than switchbacks, the trail consists mainly of man-made steps. Apparently there are about 2,200 steps. I started counting at the bottom but after a few hundred I got bored with counting. The trail starts from the parking lot at the campsite at the end of the road in the Mt Cook National Park.
Te Anau
Te Anau is a pretty little town on the west side, and its main function is probably to serve as the gateway to Milford Sound. However, another function is as the base for hiking the Kepler Track.
The Kepler Track
The Kepler Track is one of New Zealand’s Great Walks. It’s a big 60 km loop that is usually done as a 3-4 day hike, in either direction. There are two ways onto the track – the Kepler Track carpark near Te Anau, or Rainbow Reach, which is about 15 km from Te Anau. I did the loop in a long day (10h 50m), starting at the main carpark and finishing at Rainbow Reach.

It’s a wonderful hike with spectacular views once you get above tree level. The trail is very obvious and it would be difficult to get lost, except perhaps in a couple of places in very heavy clouds – or in winter.

The hiking up on the mountain tops is incredible with miles and miles of ridge walking.
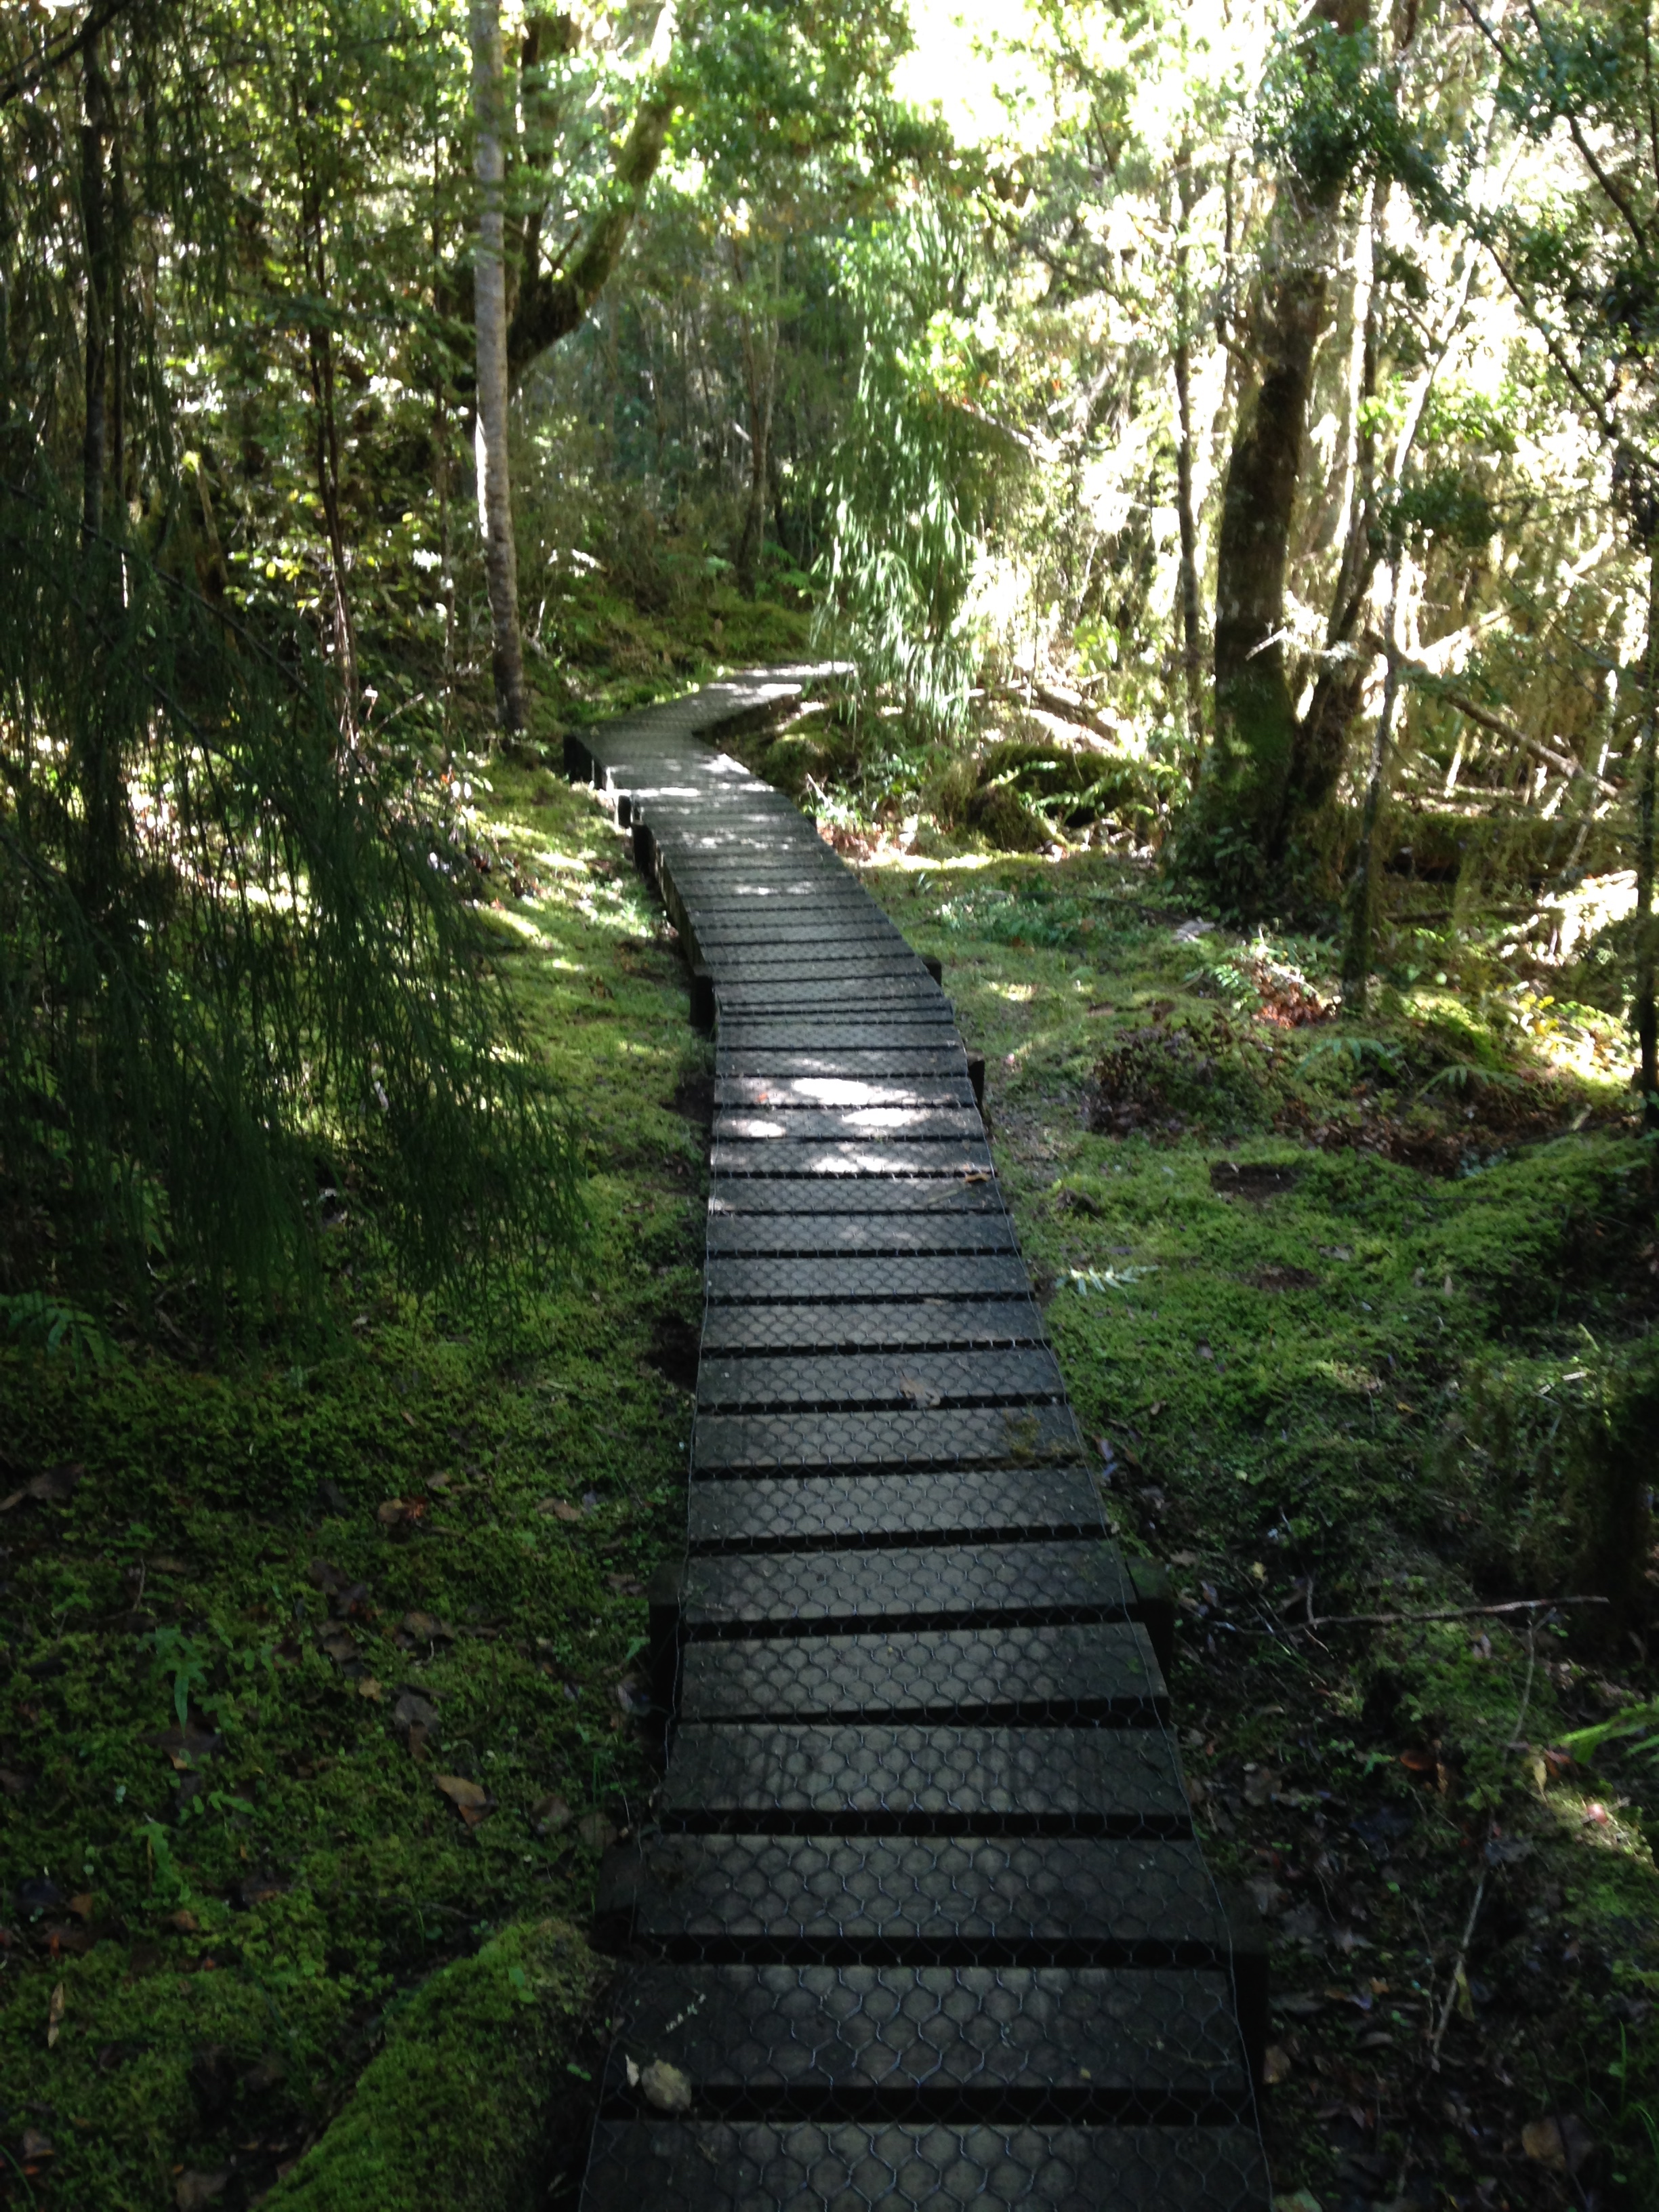
There’s also a lot of hiking through what seems like rainforest, with plenty of trees, ferns, lichen, and moss. Even on a sunny day some of this part can be wet and there are some wooden walkways in places.
Nelson Area
Abel Tasman Coast Track
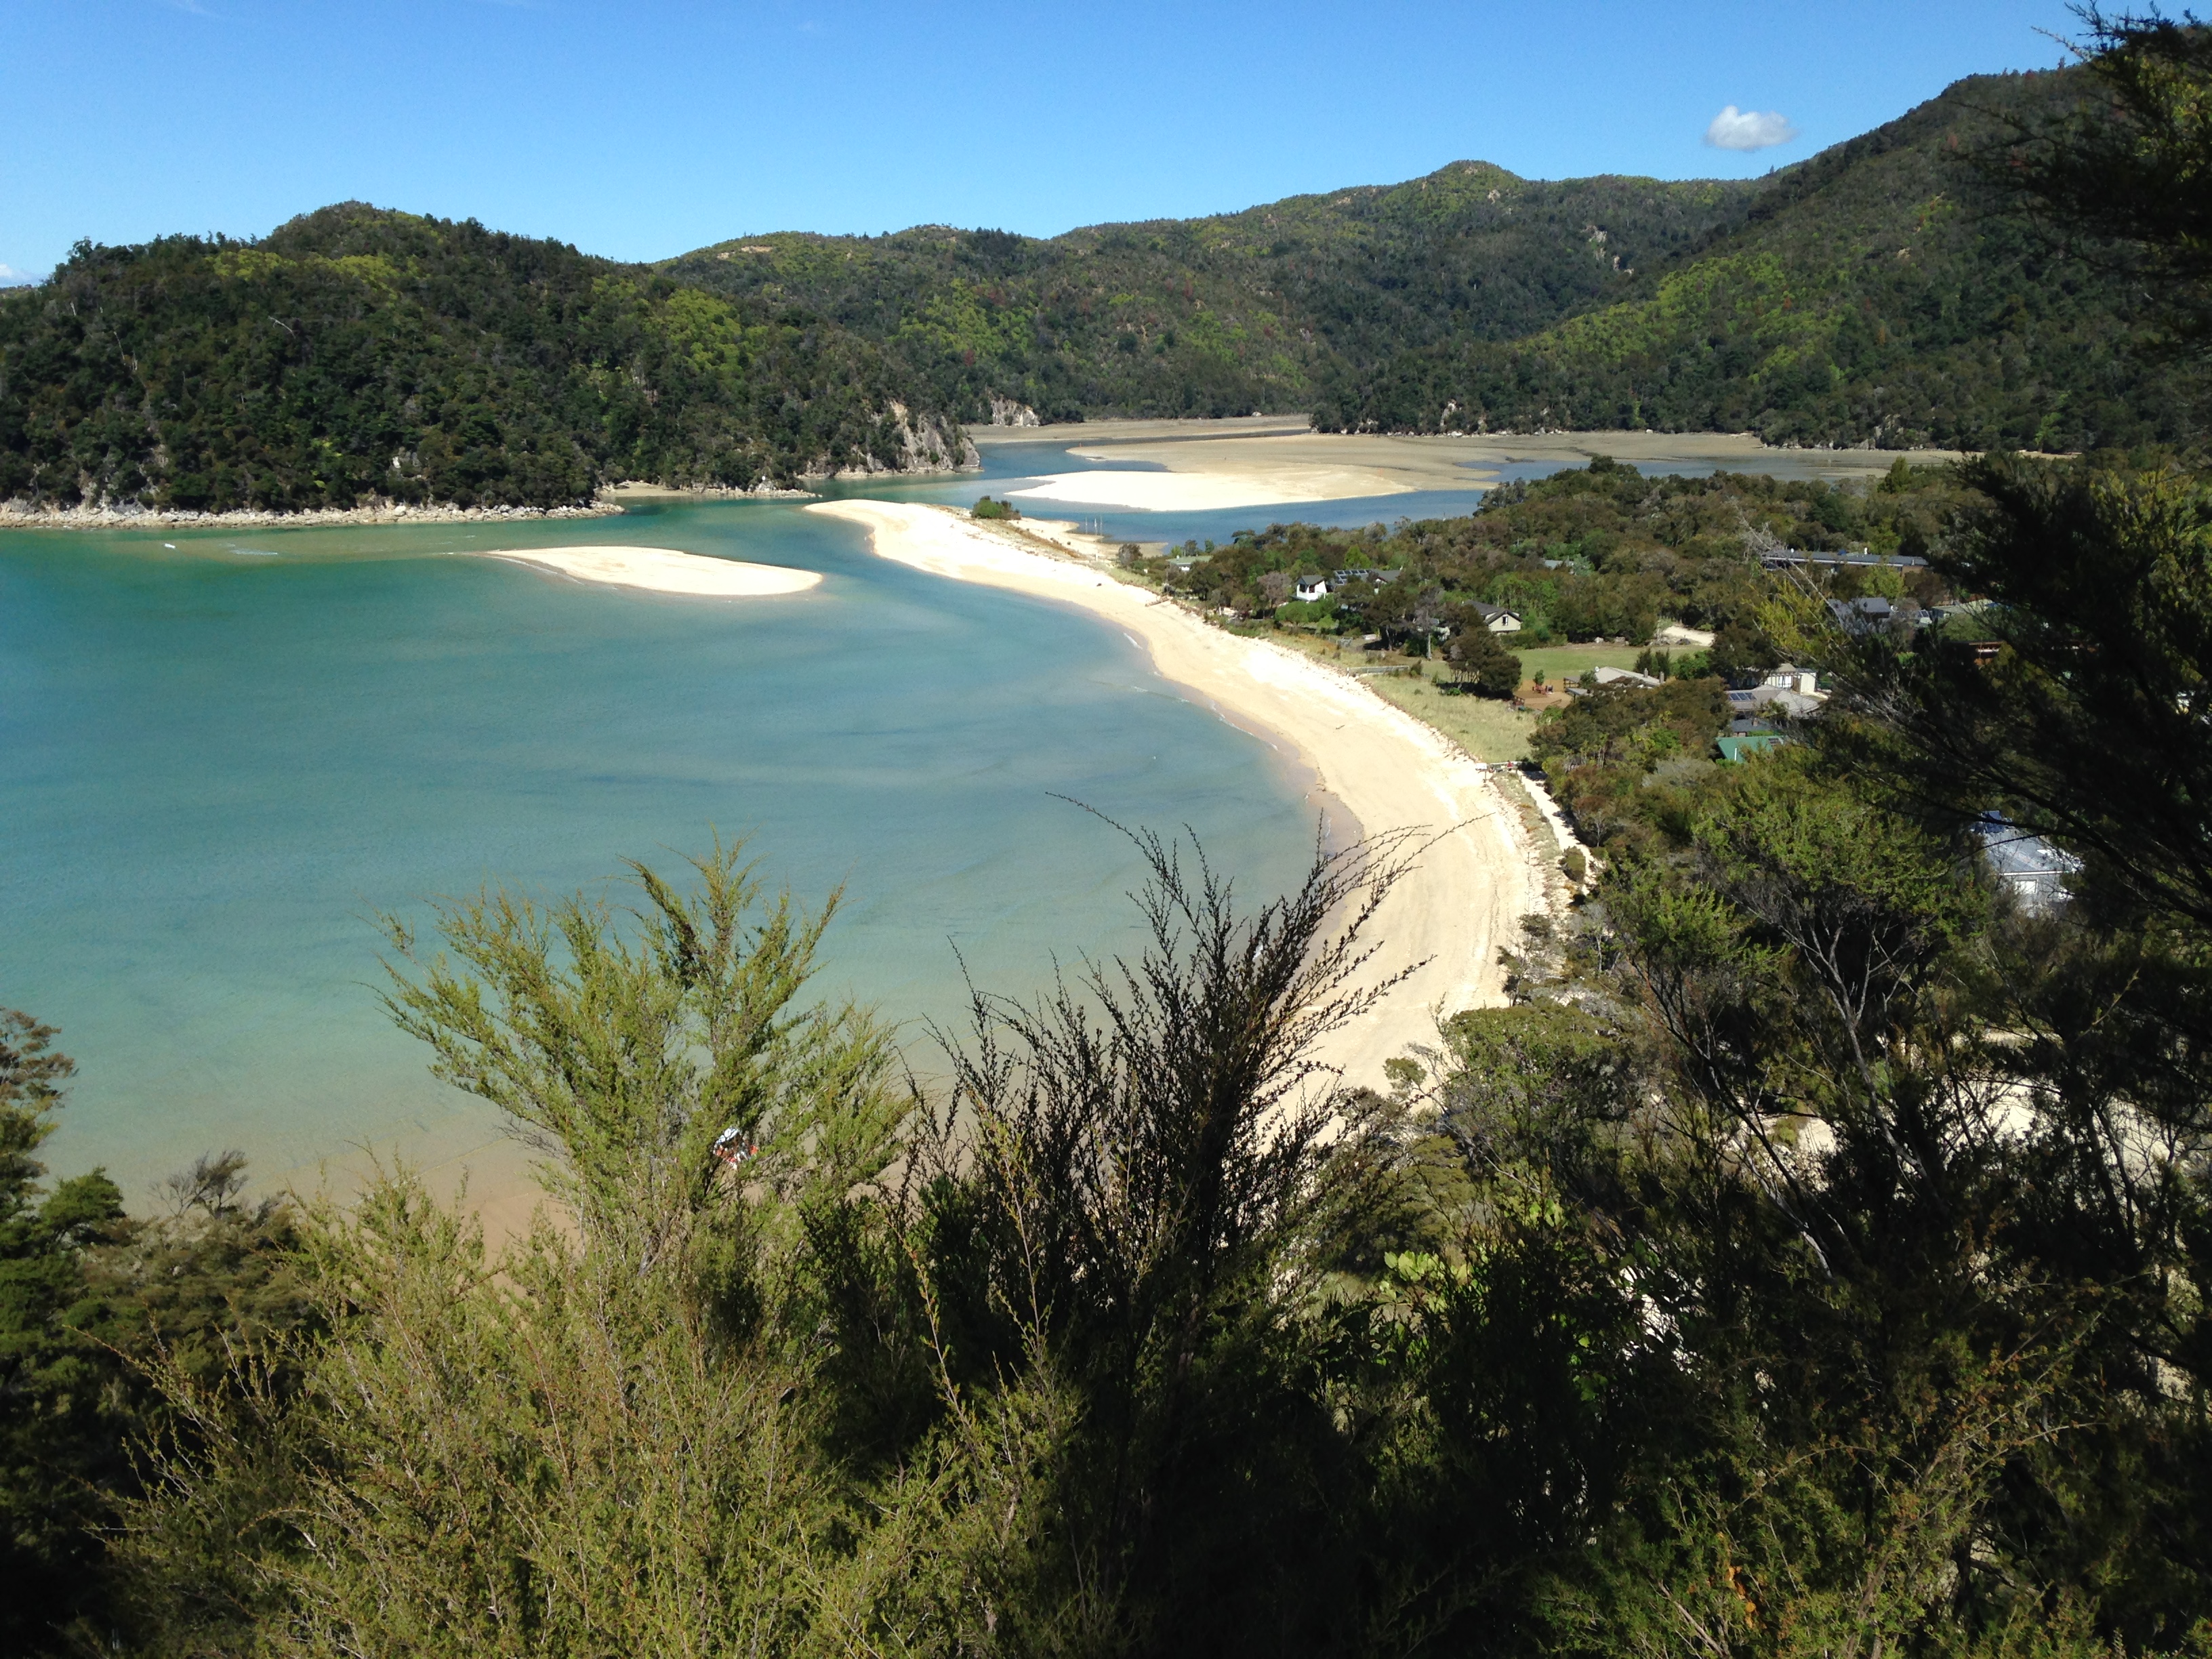
The little settlement at Torrent Bay. At the far end is the inlet you can walk around or cross at low tide.
The Abel Tasman Coast Track is a beautiful 60 km hike with lovely views of the sea and of sandy beaches, and an almost Mediterranean feel in places. There is one place where some wading is required, and two places where wading is optional, depending on the state of the tide.
It is usually hiked in 4-5 days and you can hike it in either direction, although it seems that most people do it south-to-north. I was told that many people skip the last section and finish the hike at Totanarui, so I decided I would do this, although I did it the opposite way, starting at Totanarui and walking south to Marahau, taking 9h 15m for the 44 km hike. I chose this way as I had more control over what time I would cross the Awaroa Inlet.
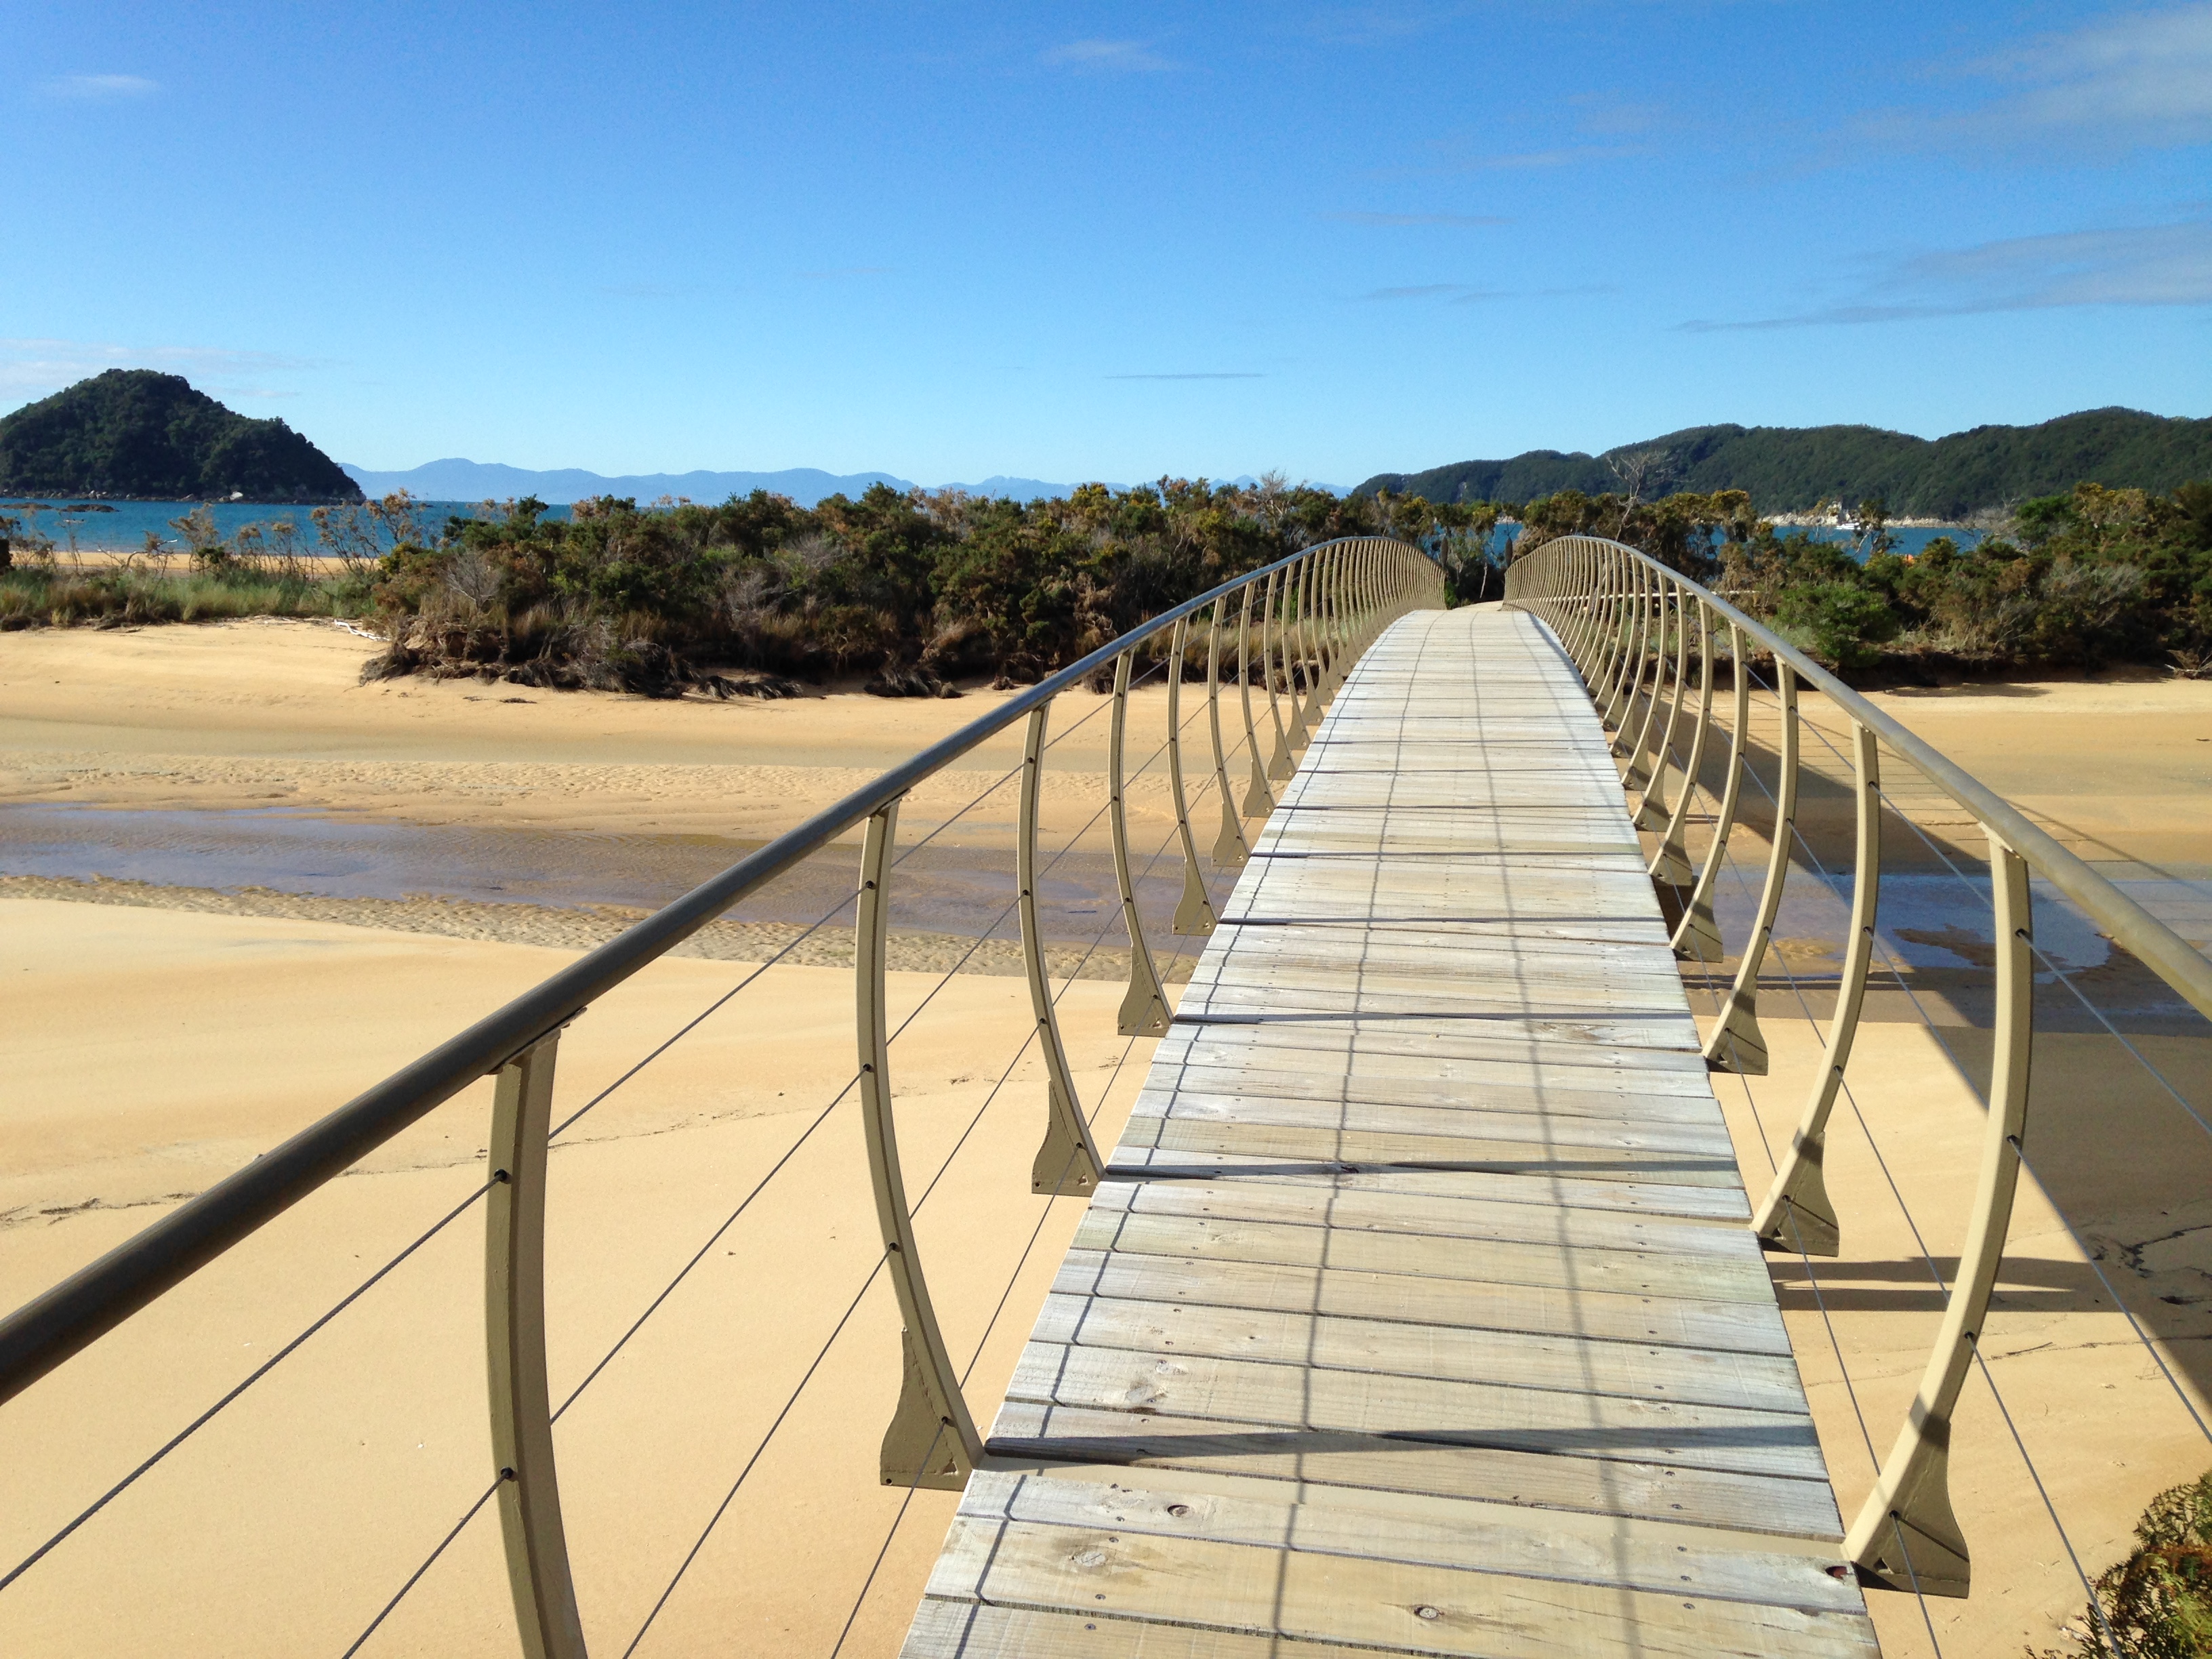
The beautiful bridge at Onetahuti Beach
Tanya and I stayed in a lovely cabin at the Pohara Beach Top 10 Holiday Park, then Tanya dropped me at Totanarui in the morning. She then drove to Marahau and got a water taxi to Torrent Bay, walked to Onetahuti, and got a water taxi back to Marahau.
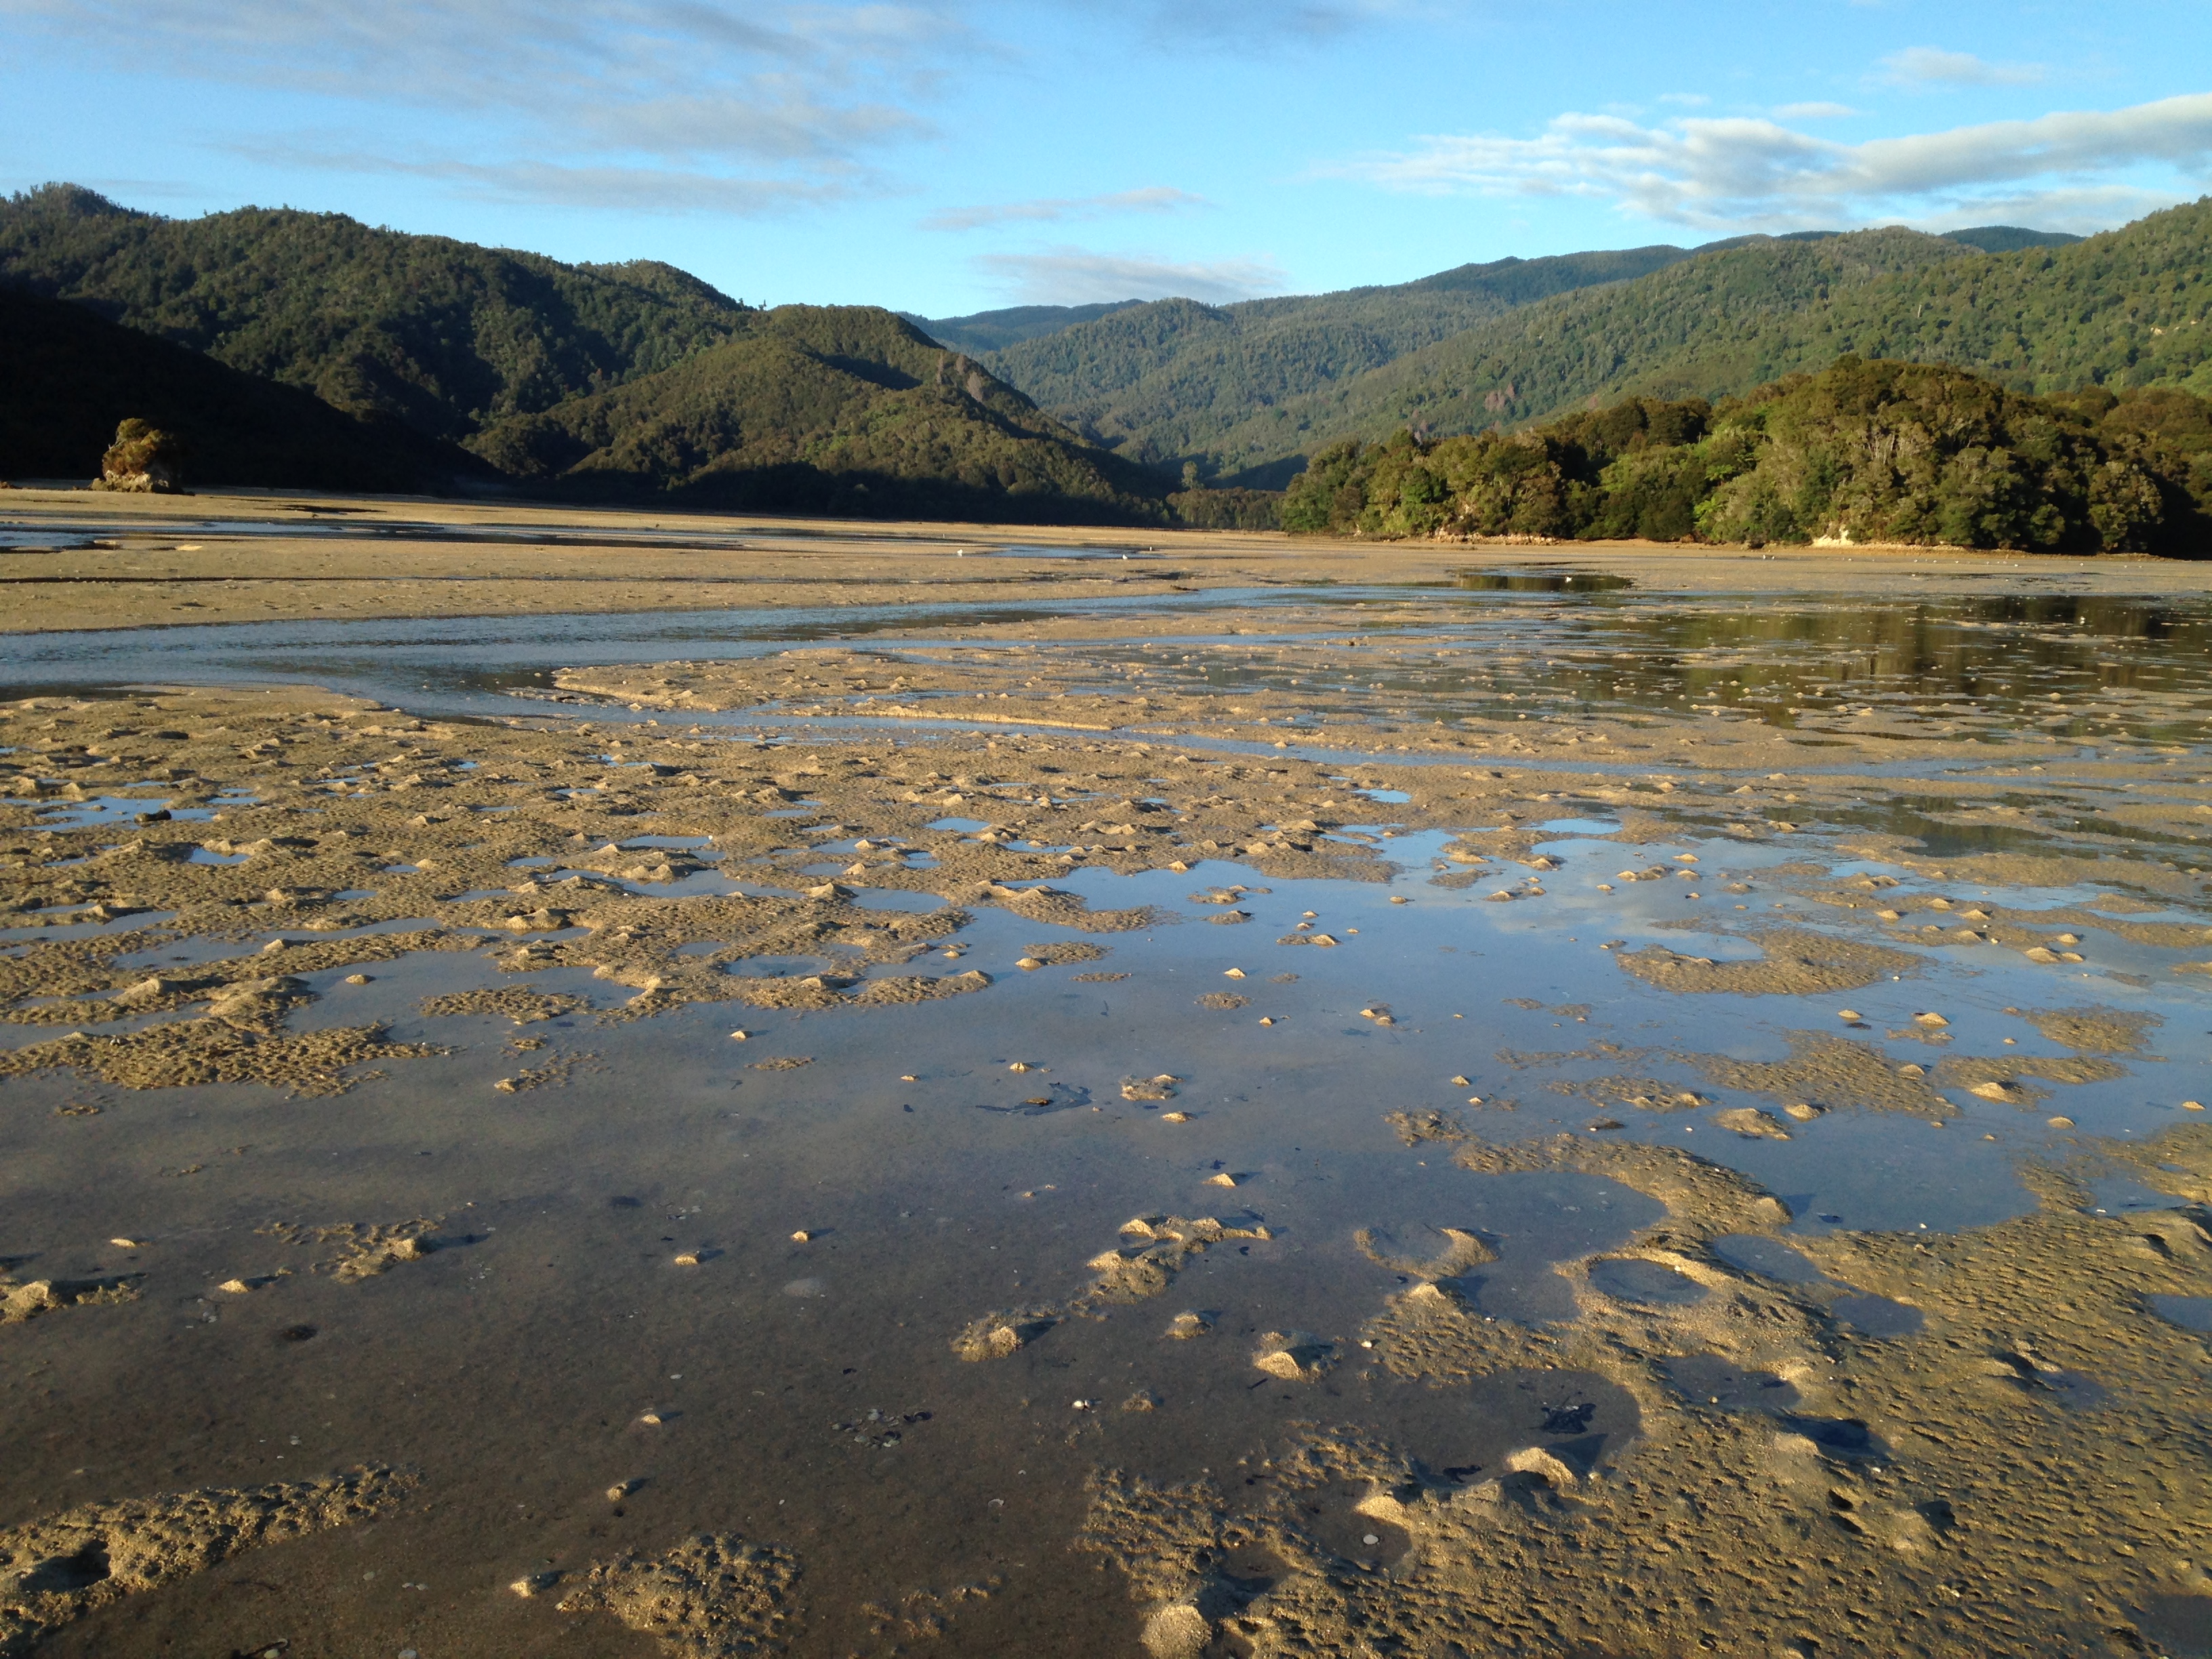
Awaroa Inlet an hour before low tide
In the meantime I hiked to Awaroa Inlet and got there about an hour before low tide. Crossing the inlet at this time was easy and mainly across wet sand. I had to wade across a short stretch of water but the water was only shin-deep. I carried Tevas with me for the wading so I wouldn’t get my hiking sneakers wet (you could do it barefoot, being careful to avoid the places where the ground is covered with shells.) At the Awaroa Hut you can wash your feet to get rid of any sand or mud.
 Continue walking south past many beautiful views and sandy beaches to Torrent Bay. On the way you will pass Bark Bay and be faced with a choice of walking across the inlet or walking around it. The difference is only 10 minutes. At Torrent Bay, after all the houses, you have another choice to wade or walk around. If you crossed Awaroa Inset at low tide, you will be facing deeper water at Torrent Bay. The nominal difference between wading and walking round is 1h 10m, but unless you intend to go into Anchorage itself, the time difference is actually quite a bit less. I chose to wade for the fun of it and was in water up to my waist.
Then just keep walking until you get to Marahau.
Abel Tasman Coast Track – Northern Loop
 This is a good loop around the northern part of Abel Tasman National Park. From the Wainui car park to Totanarui over Gibbs Hill is about 10 km; Totaranui to Whariwharangi hut is 9.8 km; Whariwharangi Hut to Wainui via the direct way is 5.7 km, for a total of about 25.5 km (16 miles). It took Tanya and me exactly 6 hours to hike.

Heading down to Totaranui from Gibbs Hill
Start at the Wainui car park and follow the Coastal Track uphill to where a signed track heads off the right to Gibbs Hill. Follow this to near the top of Gibbs Hill, and down the ridge on the other side to where the track splits. Head left and down to Totaranui. Before you reach the sea, you cross a small river then a lovely green meadow. At the end of the meadow turn left and follow the path up and over the headland, then down to Anapai Bay. Walk along the beach until the orange sign beckons you back to the trees and the hills.
Follow the path to the Mutton Cove beach and then inland to Whariwharangi Hut. Now follow the path past the hut and take the direct track up to the Gibbs Hill intersection. Finally go down the trail you climbed earlier in the day and arrive back at your car.
Mt Robert (Nelson Lakes)

On the way down Paddy’s Track
This is the classic hike in Nelson Lakes National Park. It’s not too hard and if you do the Pinchgut/Paddy’s loop it gives some good variety and great views. It’s shown as a 5 hour hike but this is a very high estimate. You can obviously do the loop either way, but the way described gives the best views.
Drive 2 km west from the main entrance to Nelson Lakes in St Arnaud to the Mt Robert Road on your left. Follow this mainly unsealed road for almost 5 km to the parking area at the end of the road.
Hike up the Pinchgut Track. A few minutes above treeline you will reach a small hut, the Relax Shelter. Shortly after this turn left and head gently down Paddy’s Track to the Bushline Hut. Continue down the sweeping trail with beautiful views of Lake Rotoiti. Then follow the trail as it heads across the face of Mt Robert and back to the road a few hundred meters from your car.
The turnaround above the Mt Robert Lodges, with Robert Ridge in the background
To make the hike a bit more interesting and scenic, from the Paddy’s Track intersection above the Relax Shelter, follow the Angelus Hut trail up the ridgeline. After maybe 2 km you reach an obvious turnaround point where you can look down into the valley ahead of you and see the Mt Robert Lodges, owned by the Mt Robert Foundation.
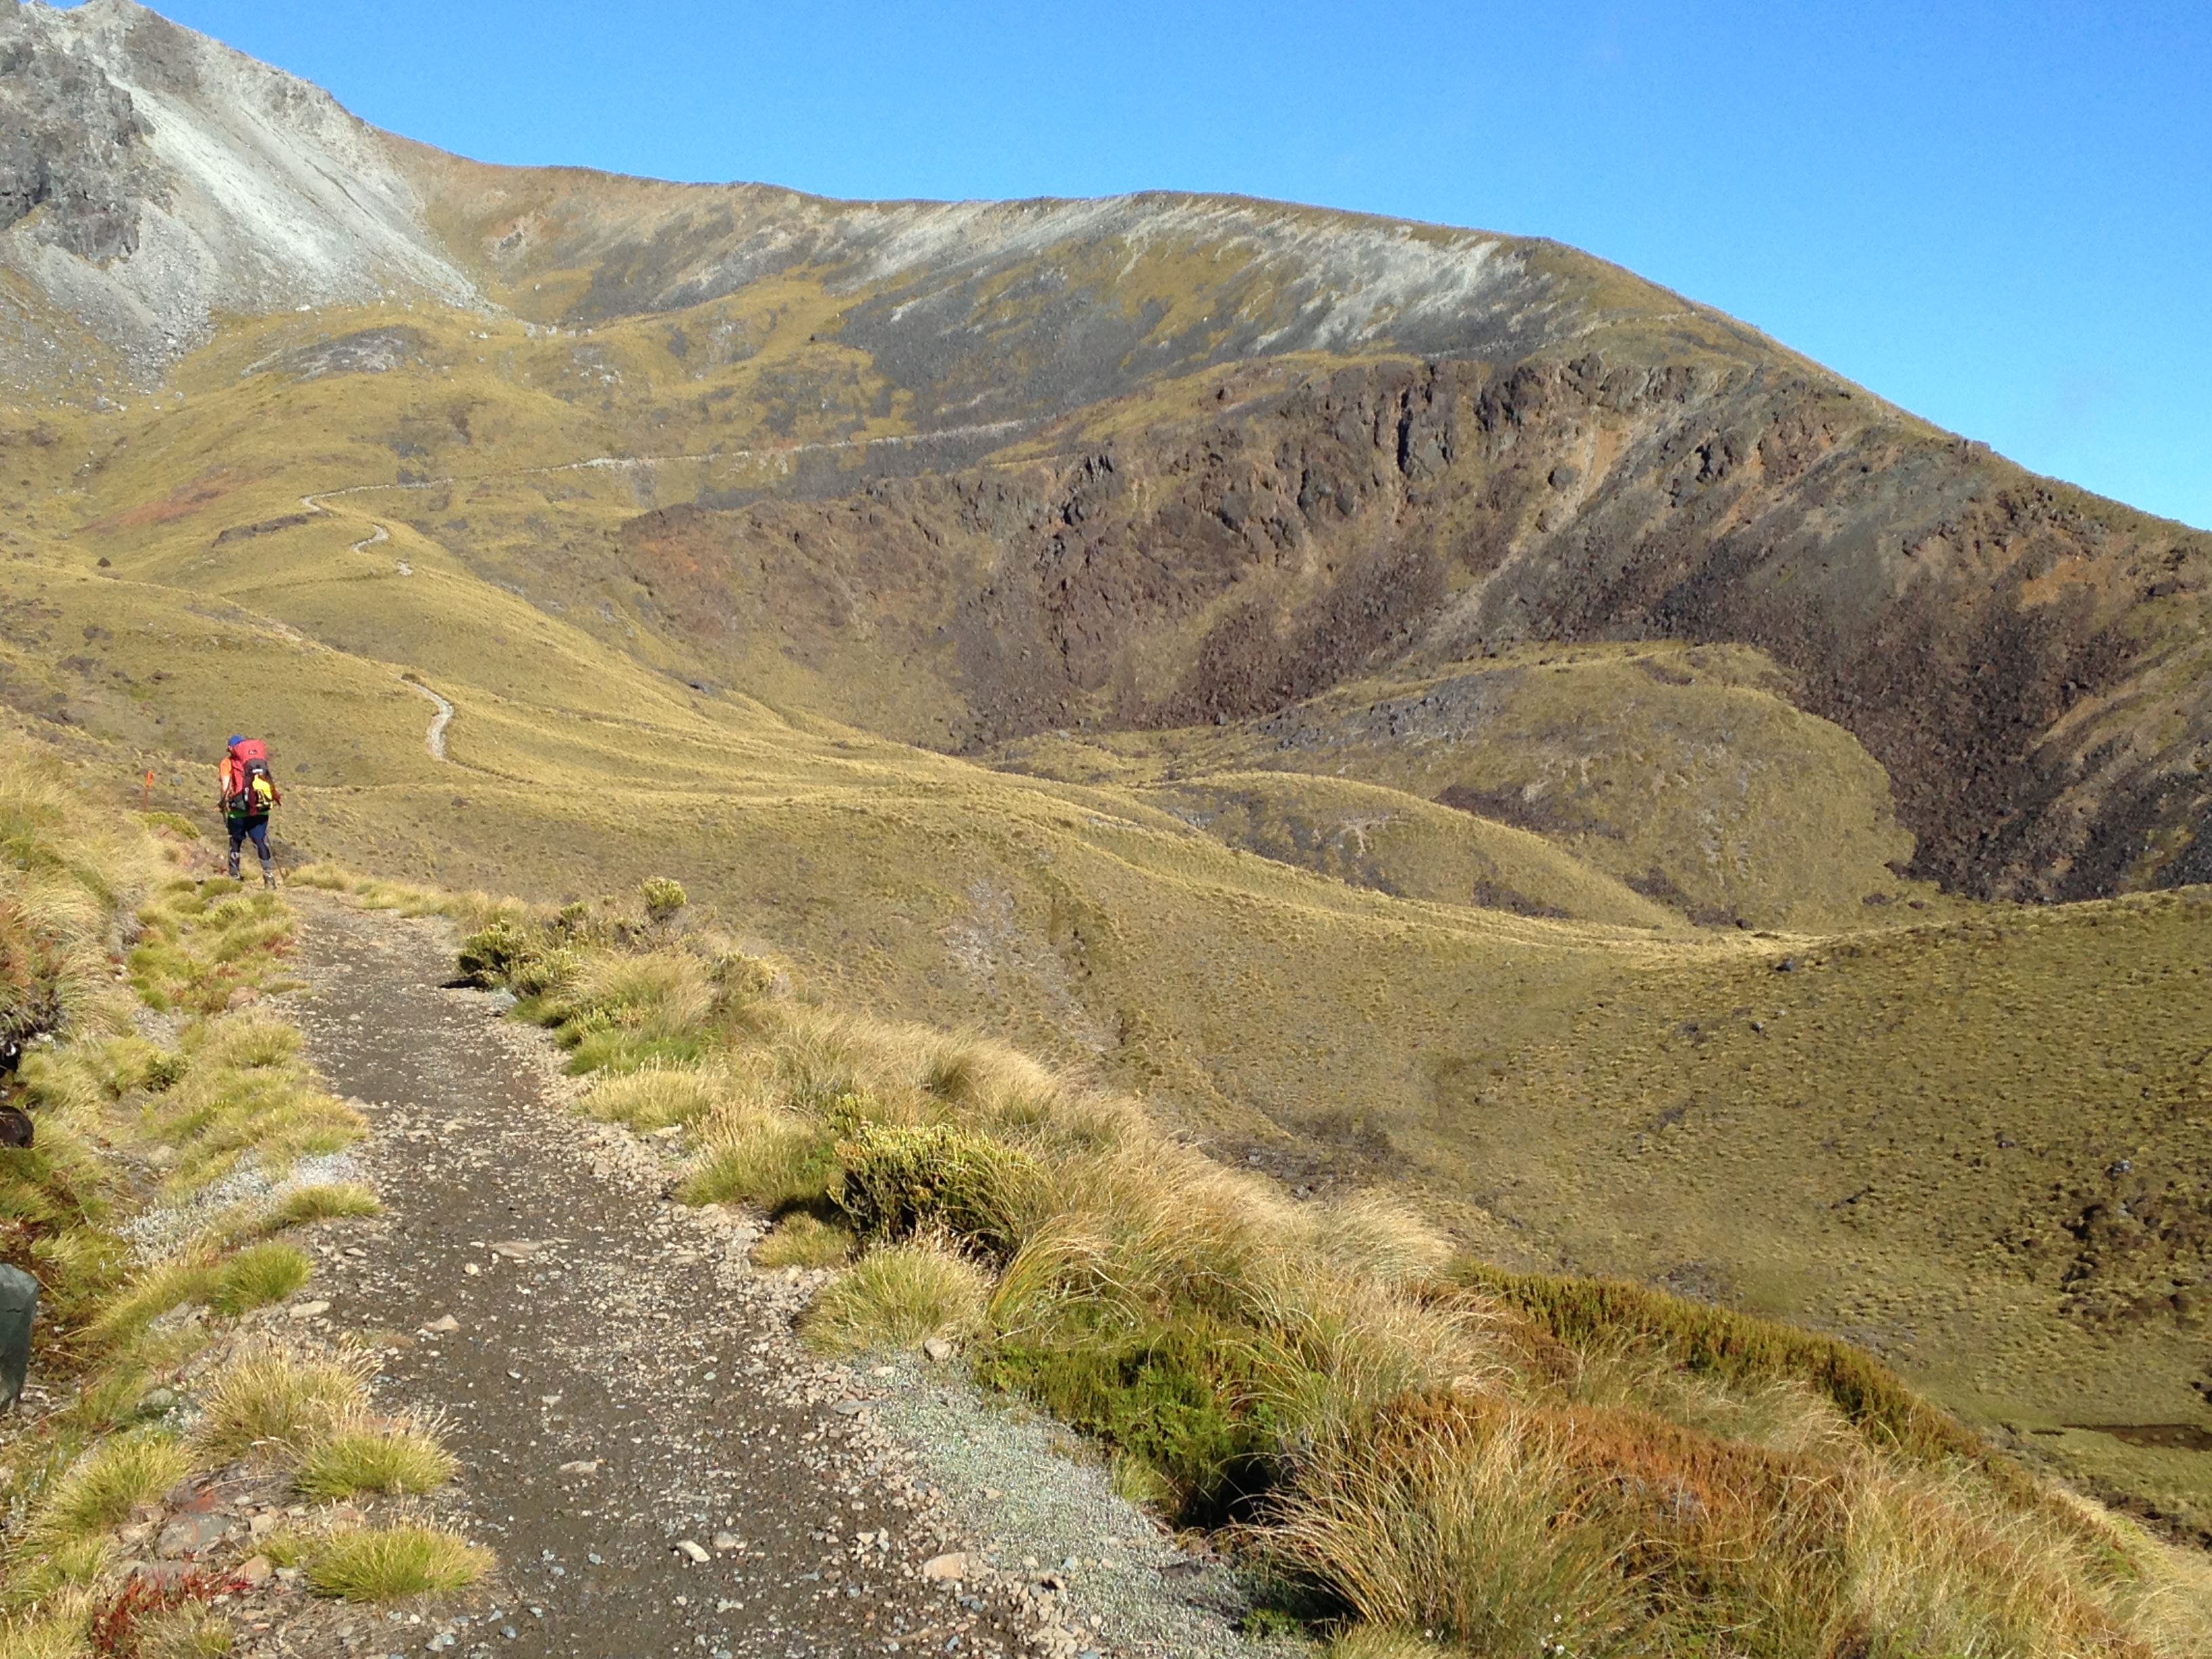
Robert Ridge to Angelus Hut
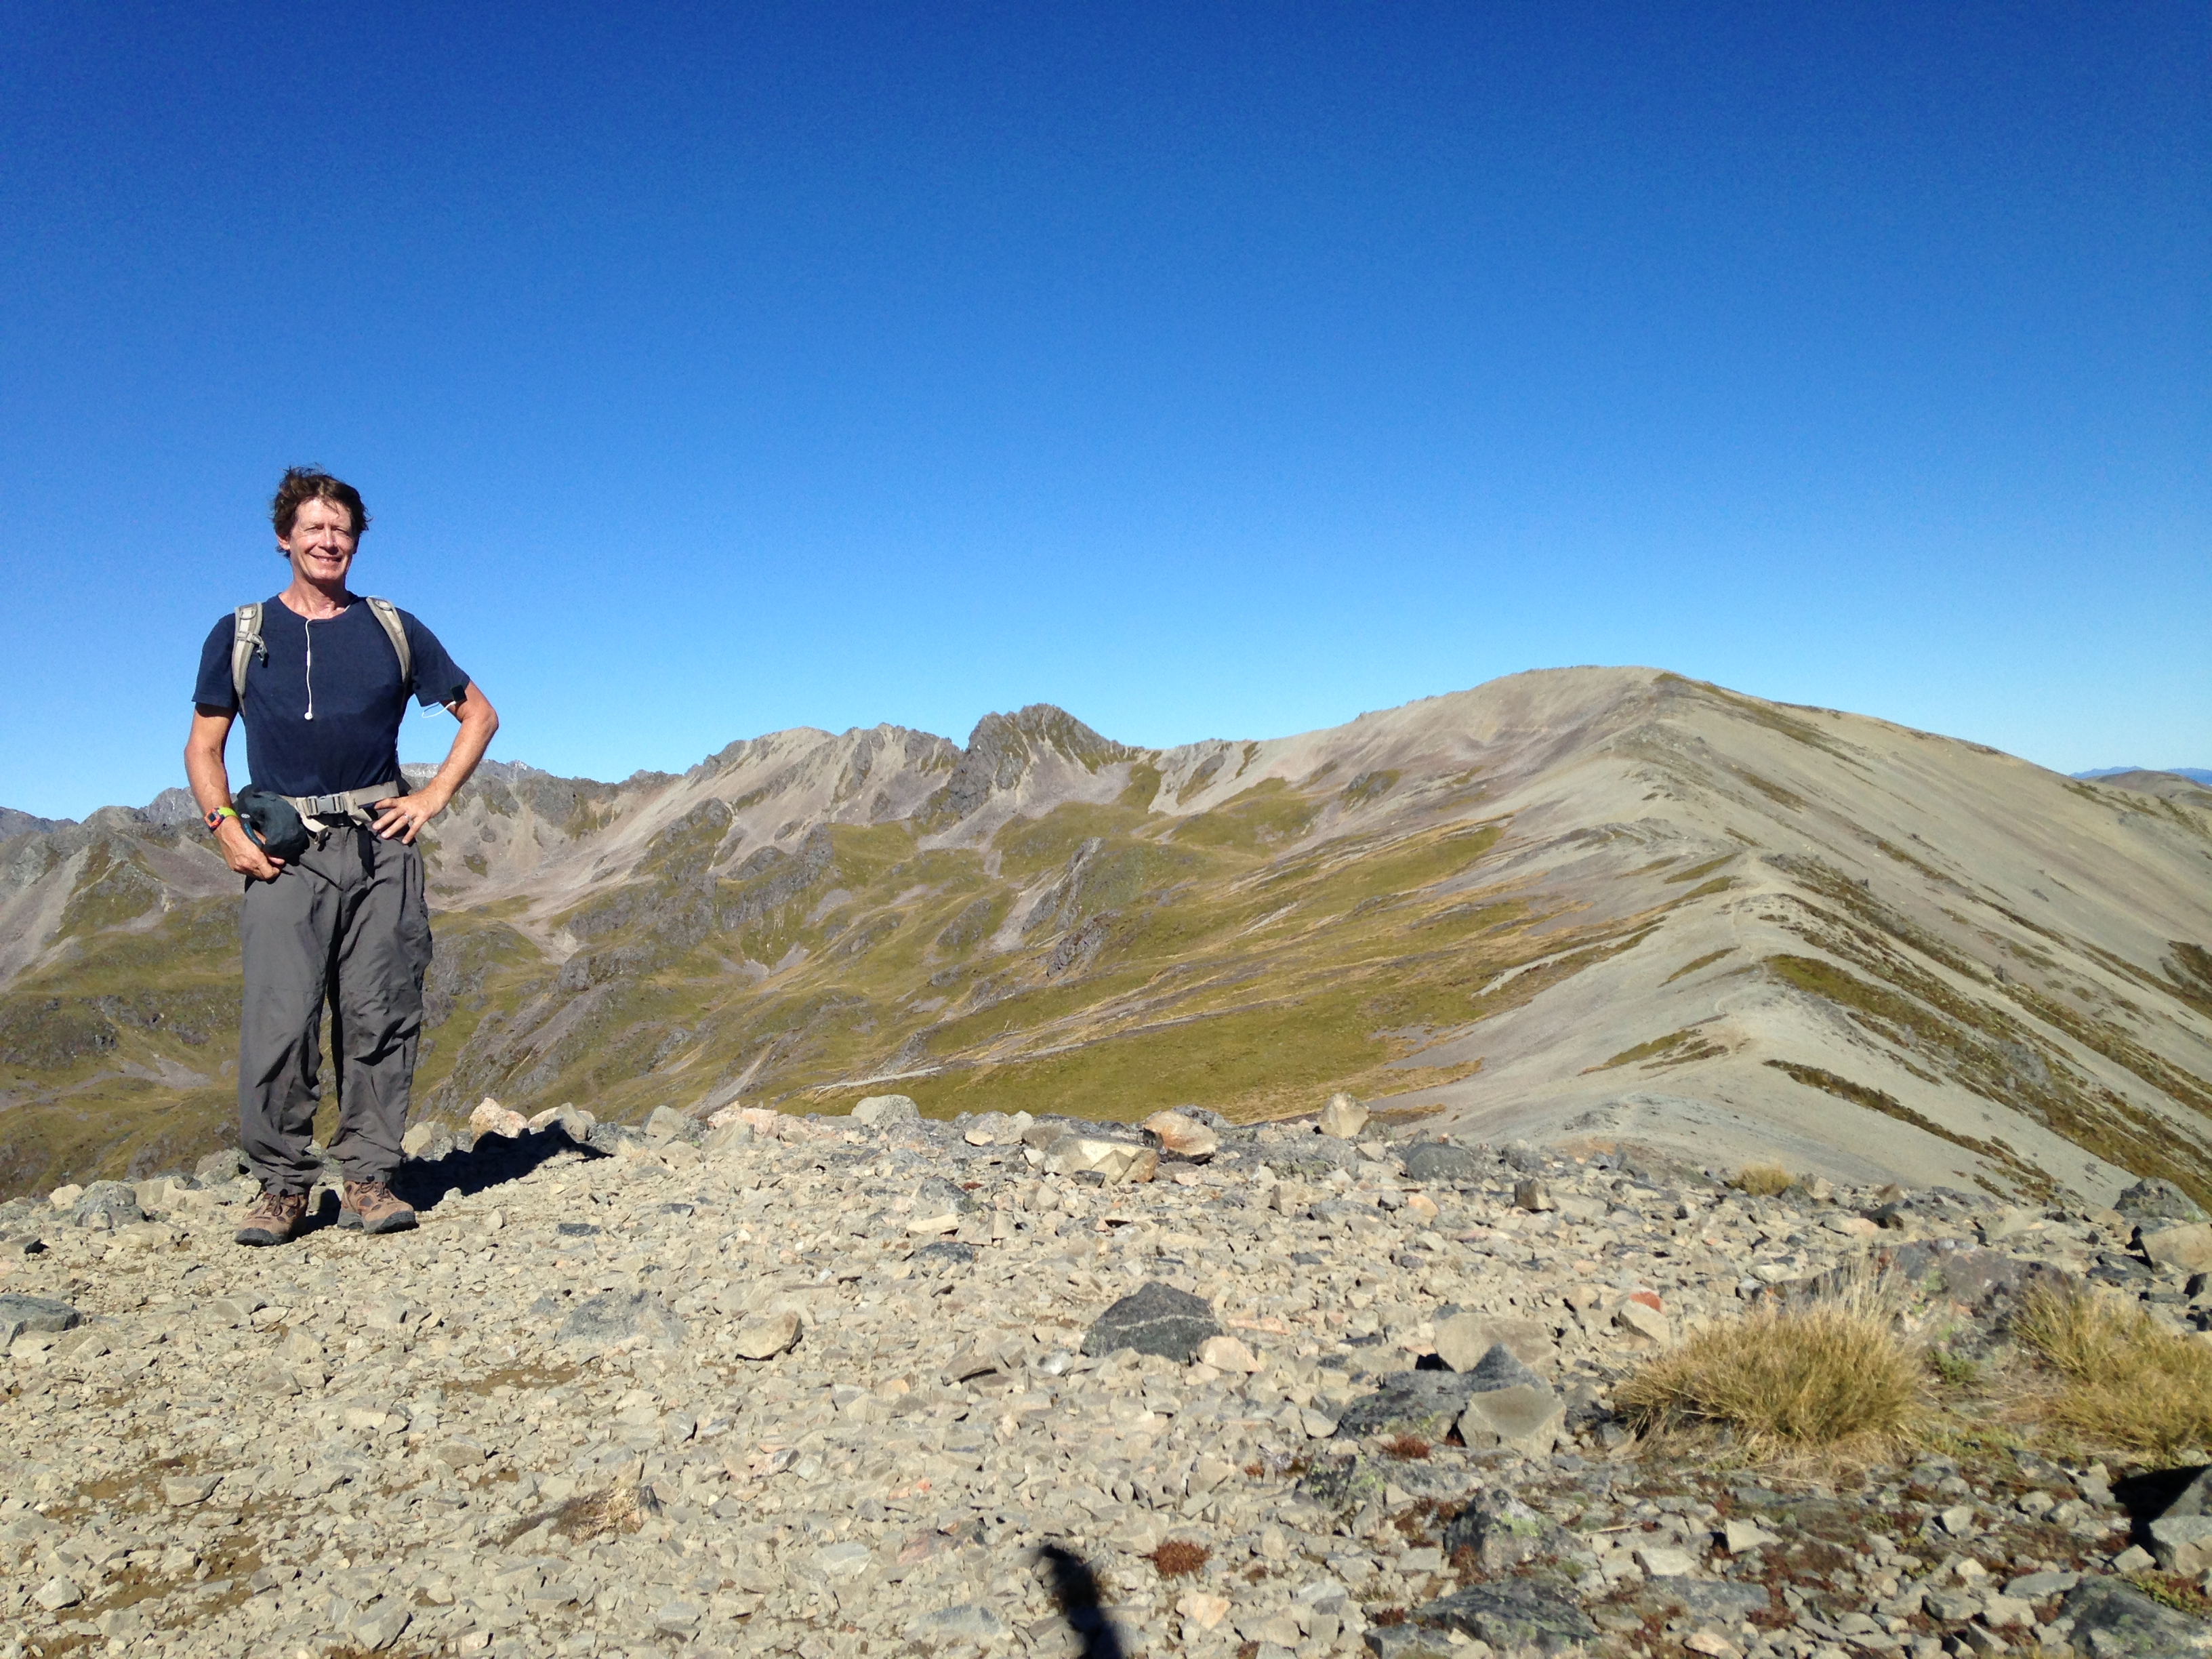 A fantastic hike in beautiful, wide open country, with lovely views everywhere. One of the best hikes I did in New Zealand, it includes well graded trails and rocky, be-careful-where-you-put-your-feet terrain. The trail is 12.2 km each way and is signed as taking 6 hours in each direction, for a 12 hour round trip. But this is for hikers with backpacks. It took me 6 hours 40 minutes for the round trip.
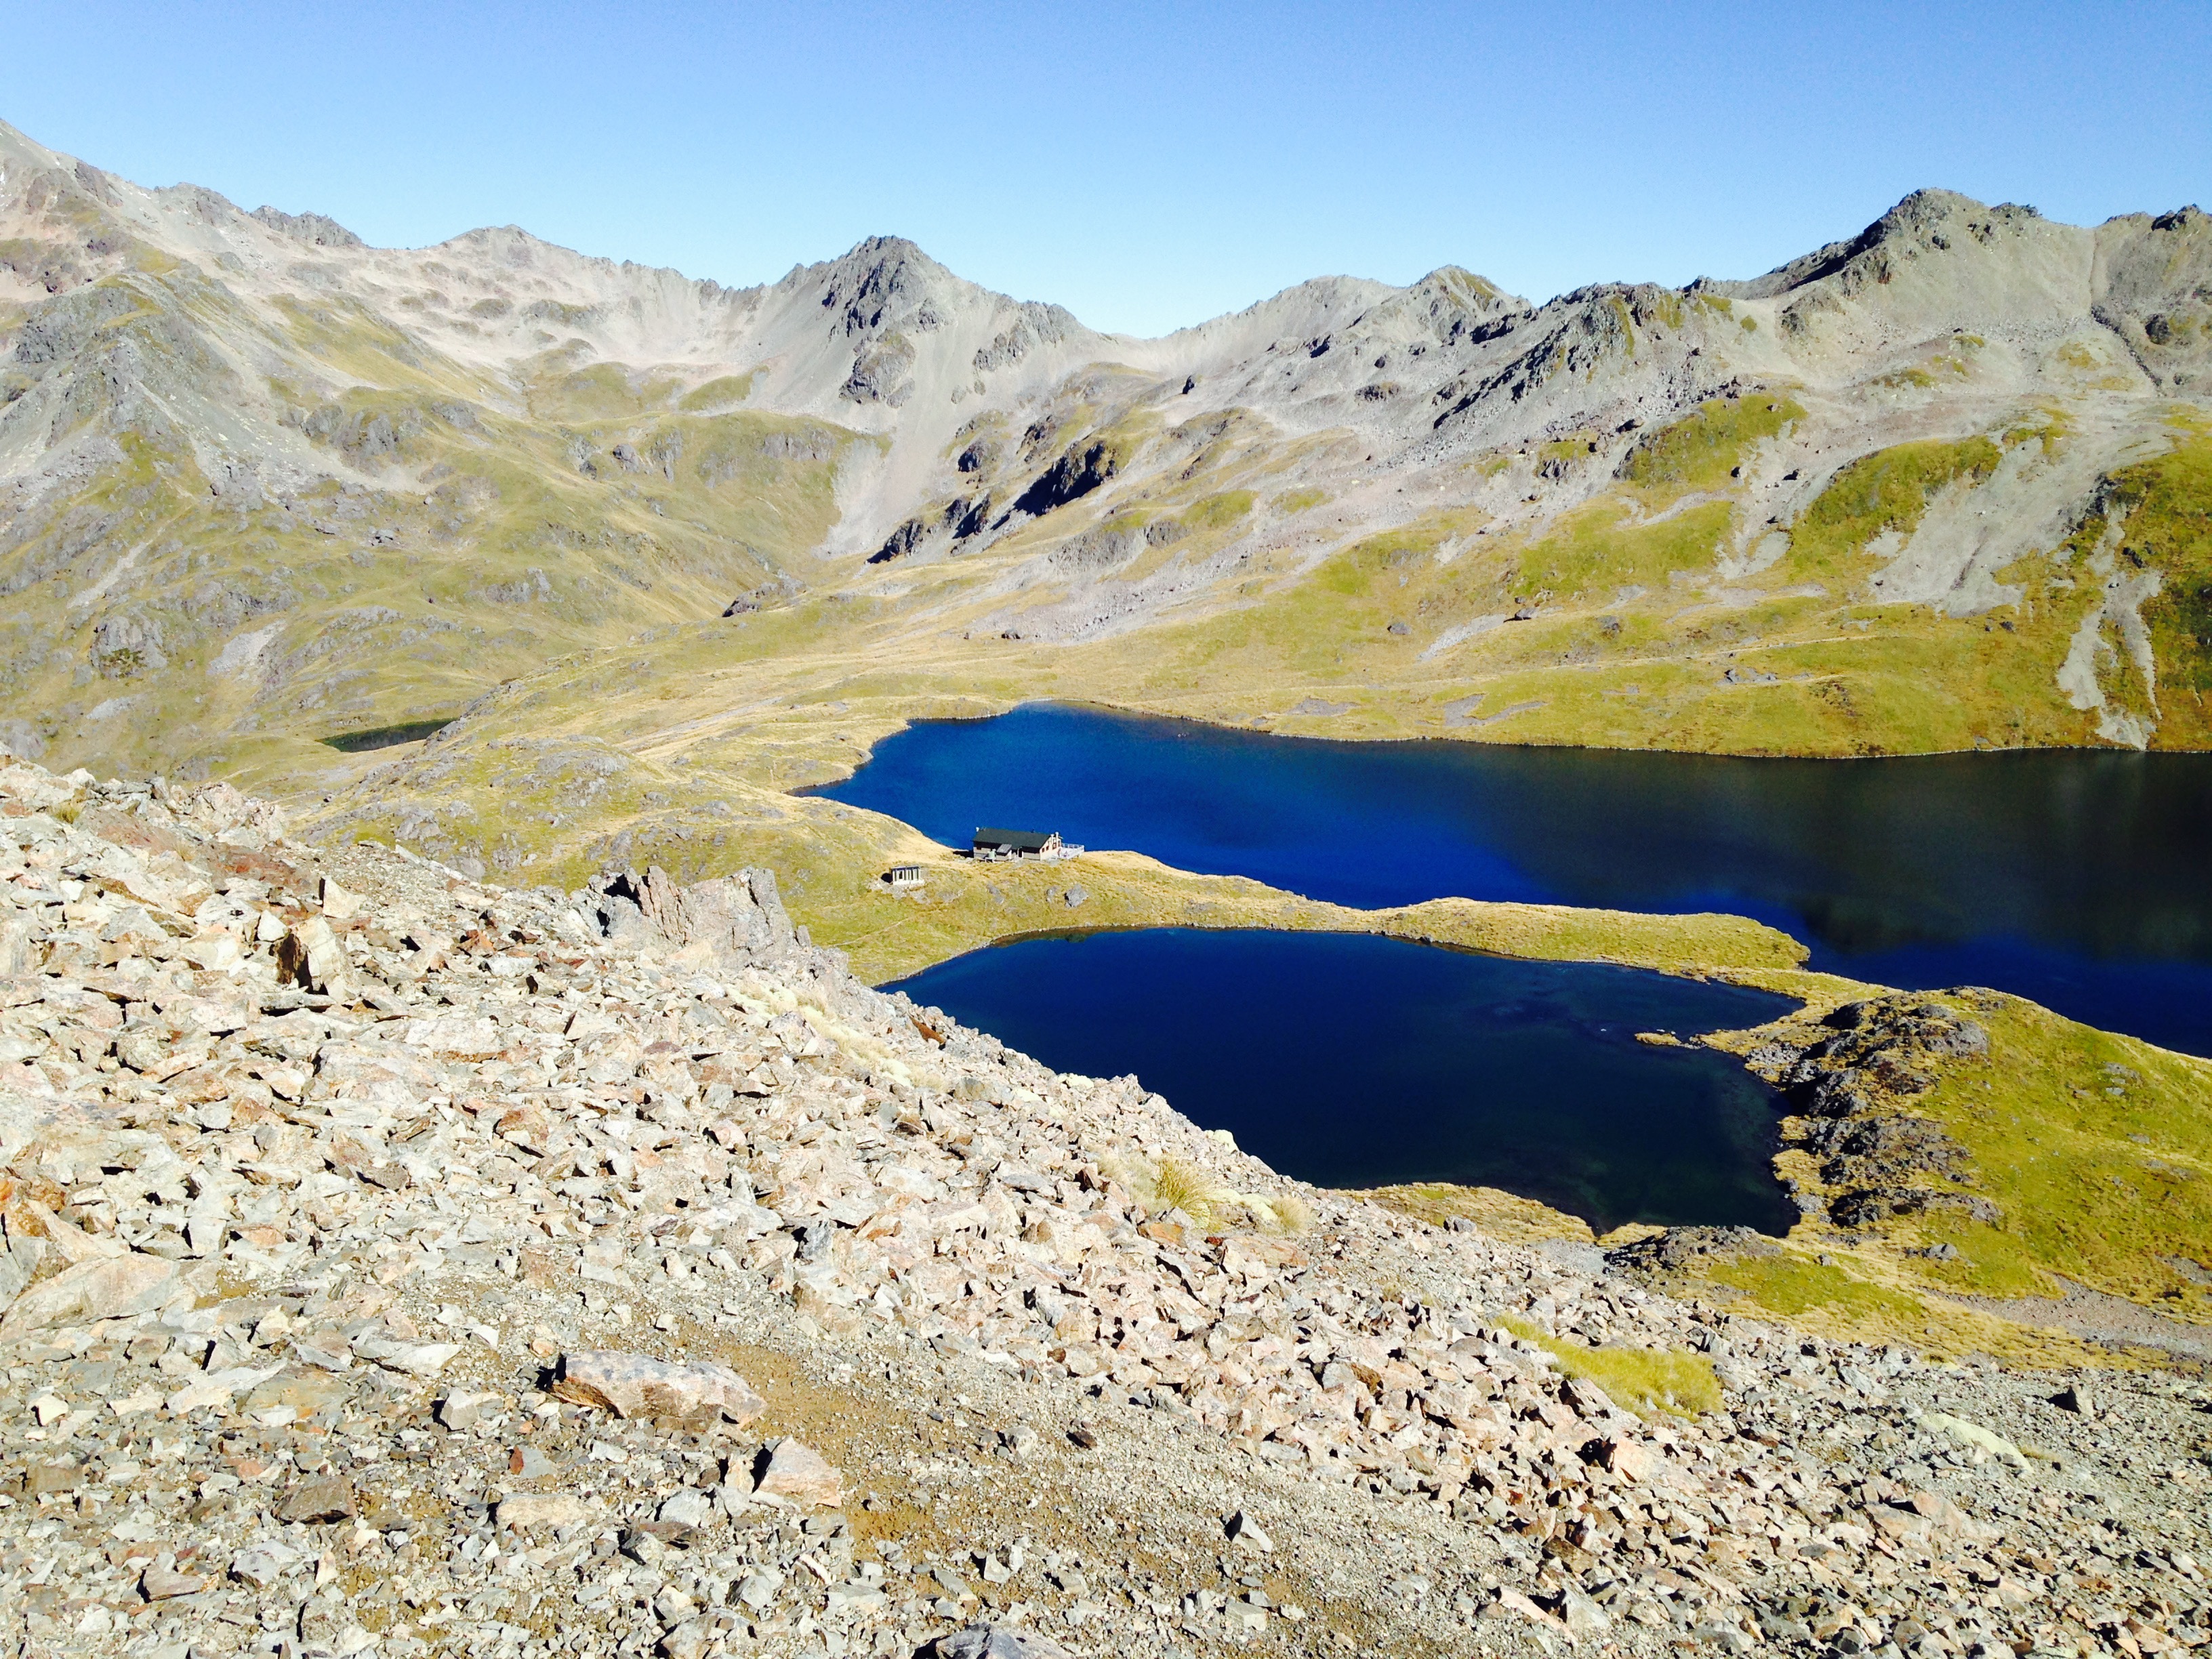
The Angelus hut is between the lakes, on the left
Start as for the Mt Robert hike, then after the Relax Shelter continue up the ridge. Never too steep, it continues over several rises until you finally see the Angelus Hut below you, nestled at the left end of Lake Angelus. Drop steeply down to the hut, knowing you will be facing the steepest climb of the day on the way back 🙂
Walks around Nelson
Nelson has a lot of hiking nearby. Here is a New Zealand guide to walking in the Nelson area. It has some 40 articles about the different hikes. Here is the official Walk Nelson guide. Here’s a guide to Boulder Bank, an amazing narrow, naturally created spit, 8 km long and consisting of small boulders. We did some of the spit but got bored after a while since the walking is all the same. The Grampian hike at the southern end of Collingwood was a nice hike.
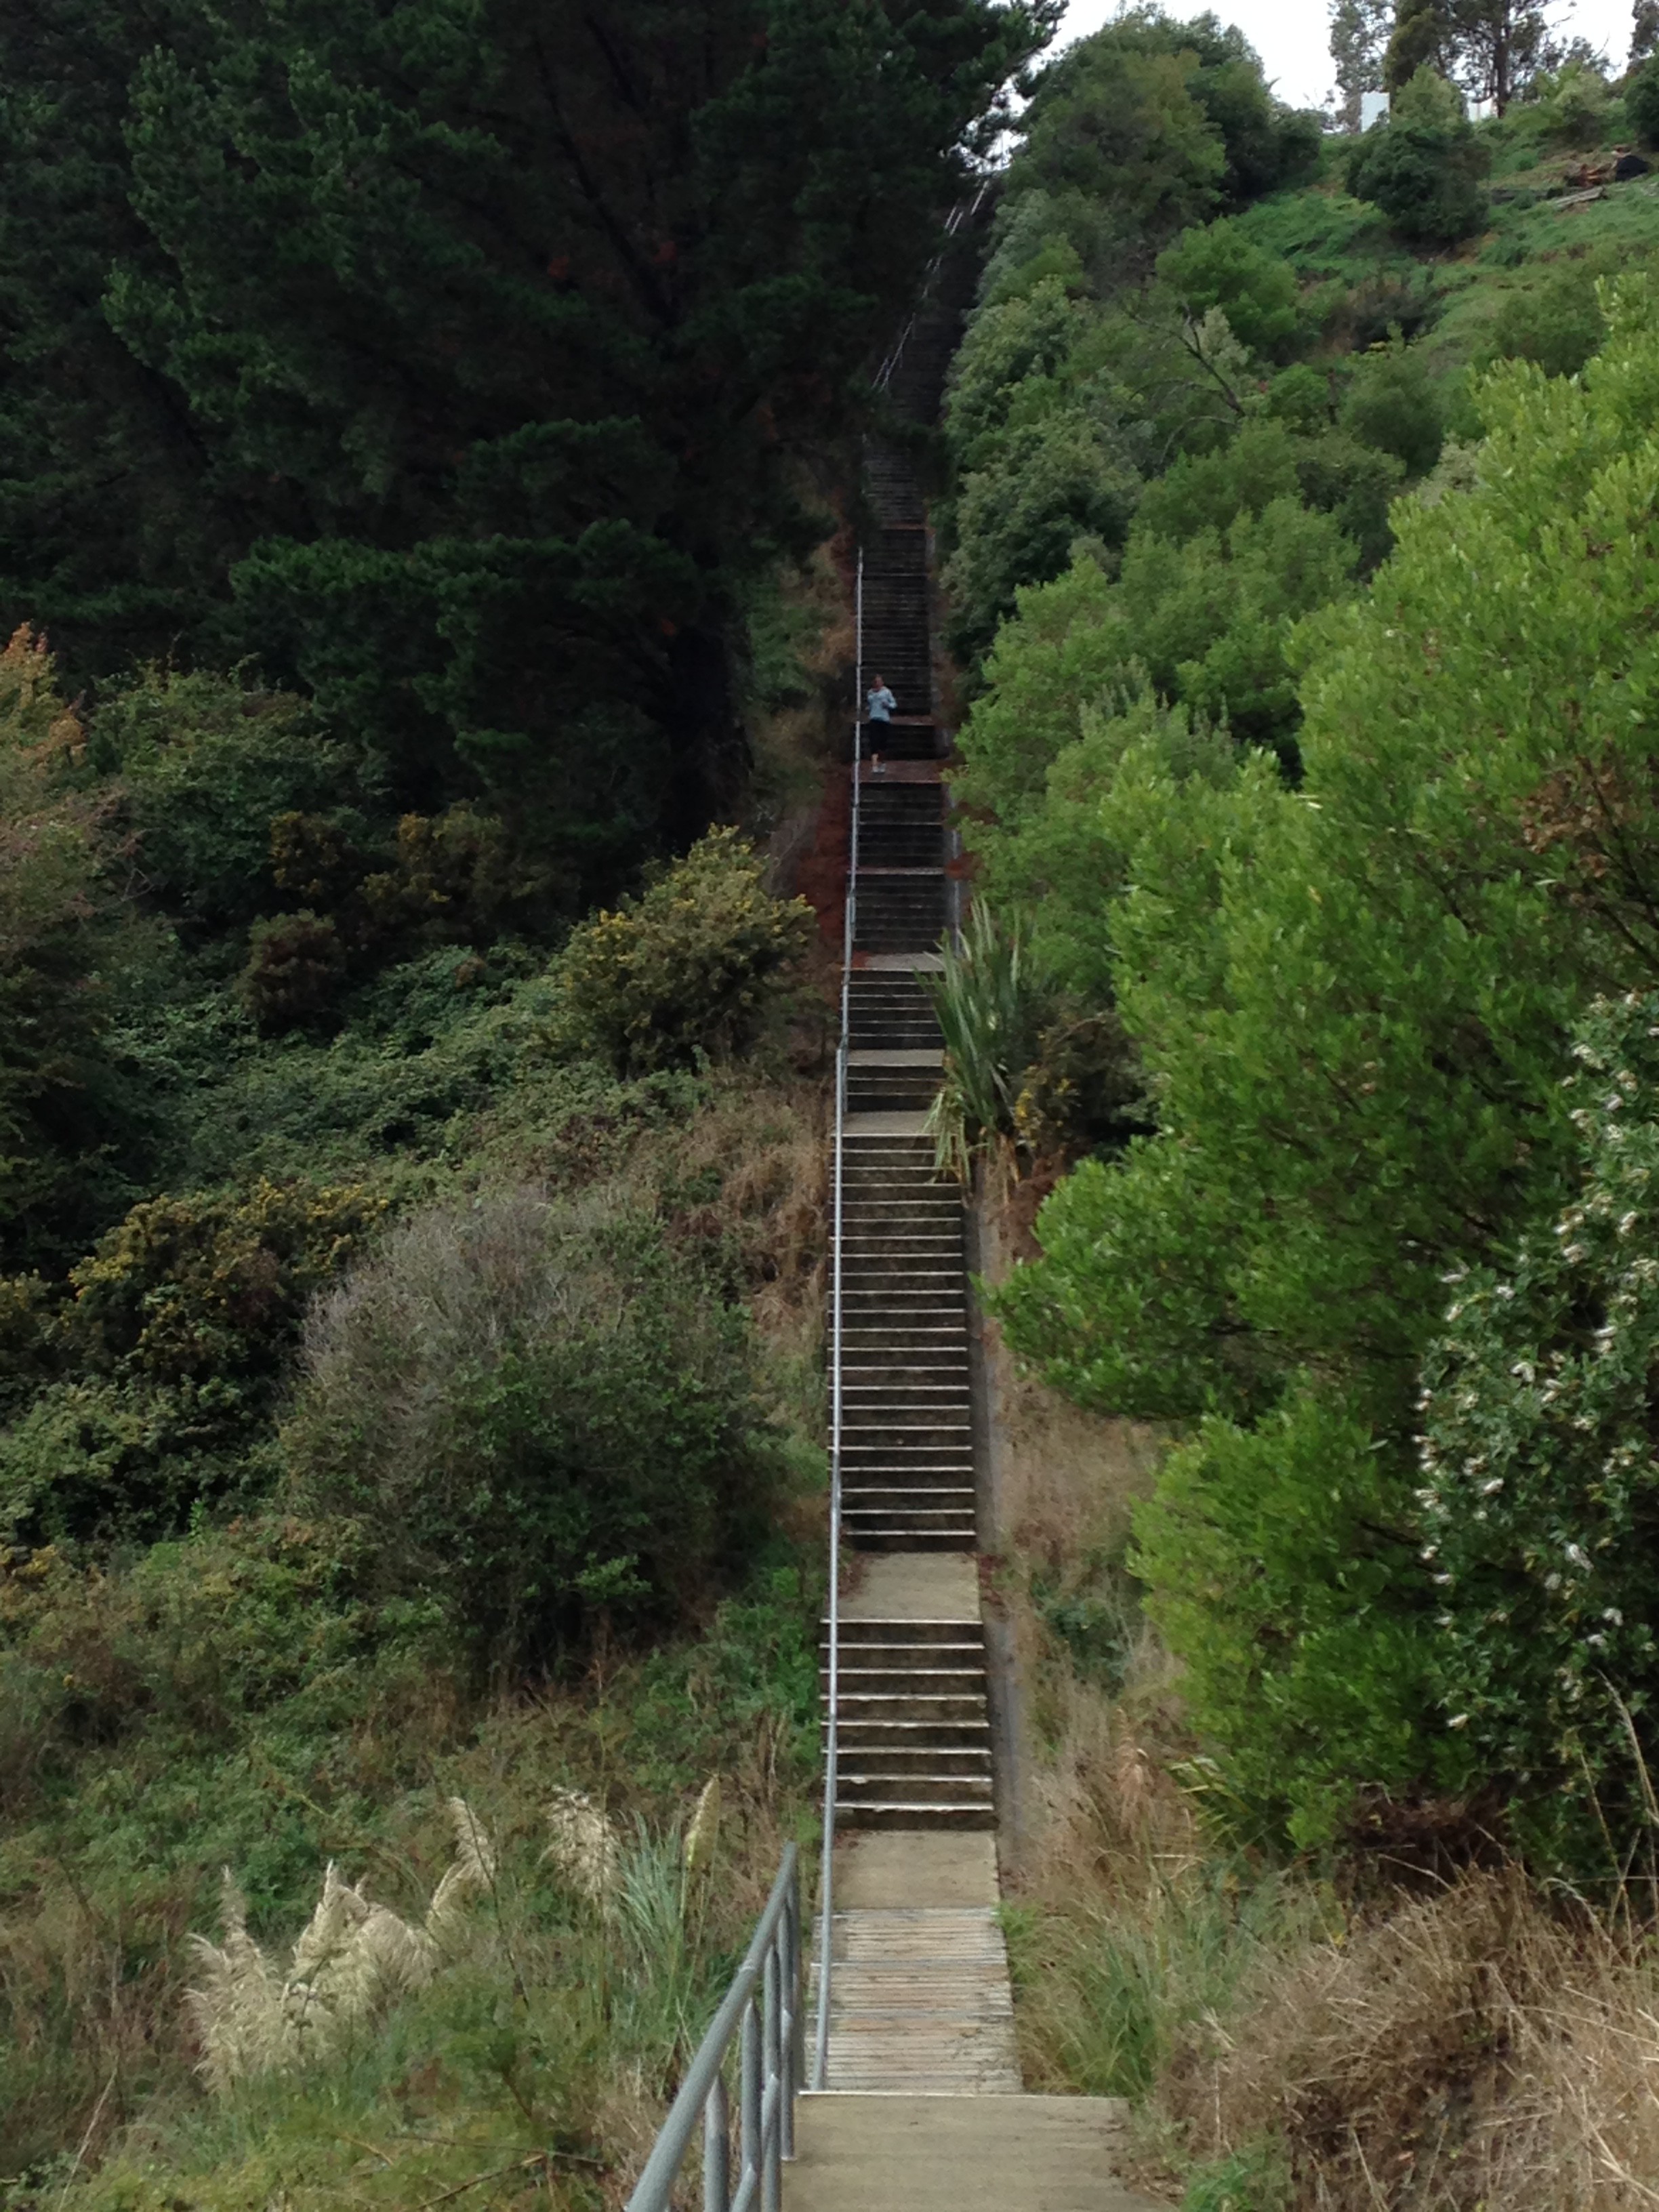
The upper part of the Tamaki steps
As well as all the normal hikes, Nelson has lots of steps that you can walk or run up if the weather is not so good. The best one we found is the walkway between Tamaki Street and Princes Drive. It has 344 steps going up, with another 11 going down. These steps seem to be popular with people looking for a workout. Here’s a link to a brochure showing all the walkways in Nelson and nearby Stoke.
Links and Other Clicks
The New Zealand government provides a host of incredible documents and maps to hiking in New Zealand. From the links below you can explore and find documents and maps to other areas in New Zealand.
A guide to hiking in the Wanaka area. This page also has a link to a map of the area showing the hikes.
A guide to hiking in the Queenstown area. This page also has a link to a map of the area showing the hikes.
The brochure for the Rob Roy Track.
Information about the Brest Hill Track.
Here’s a map of the day hikes in Aoraki / Mount Cook National Park.
Information about the Kepler Track.
An Abel Tasman Track PDF brochure.
A web page where you can find the Abel Tasman Low Tide Timetables.
Information about Nelson Lakes National Park.
Descriptions of the various ways to the Angelus Hut in the Nelson Lakes area, including the Robert Ridge route.
The Mt Robert Foundation web page.
